


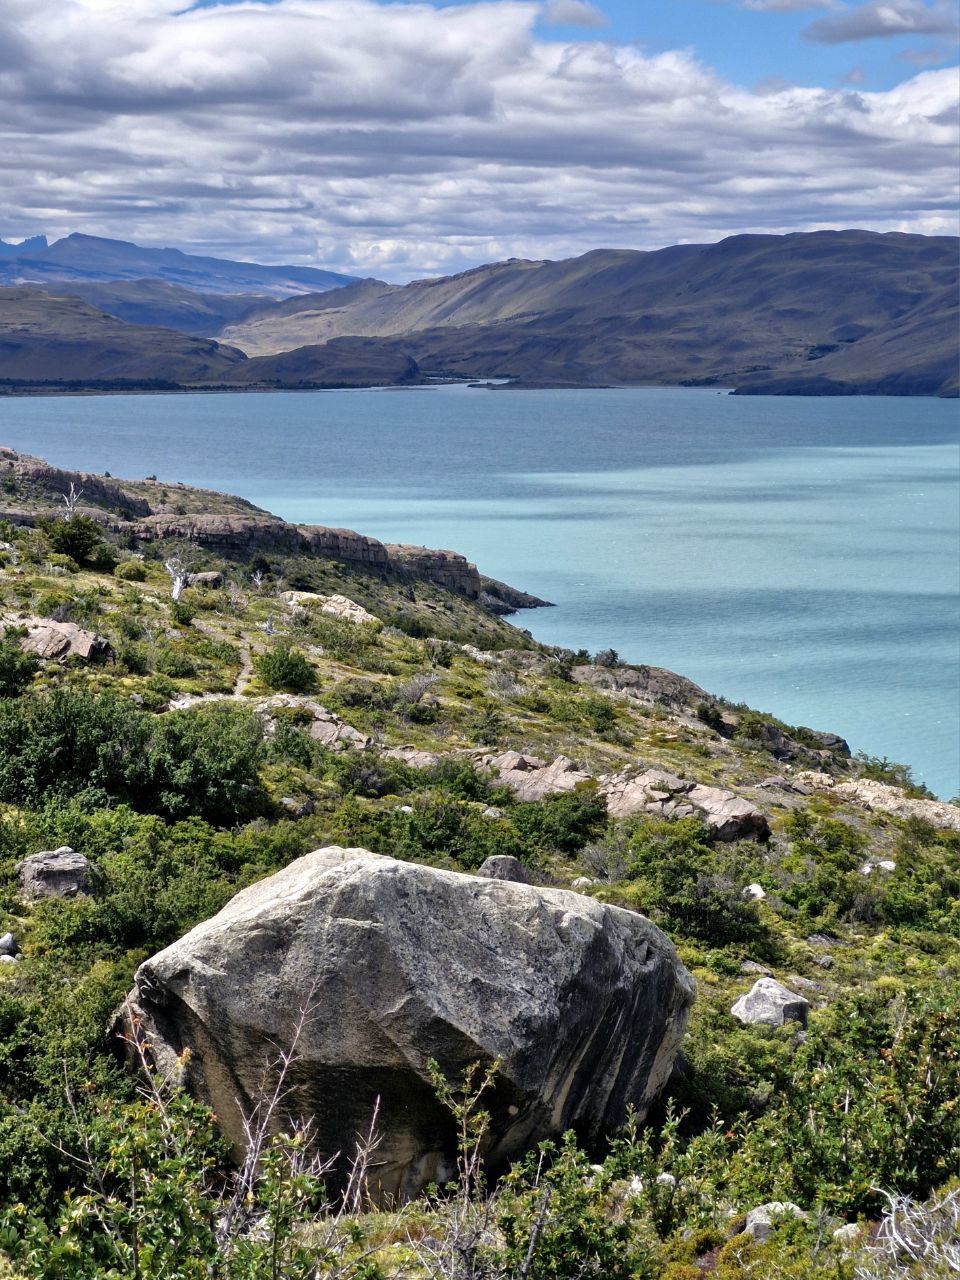
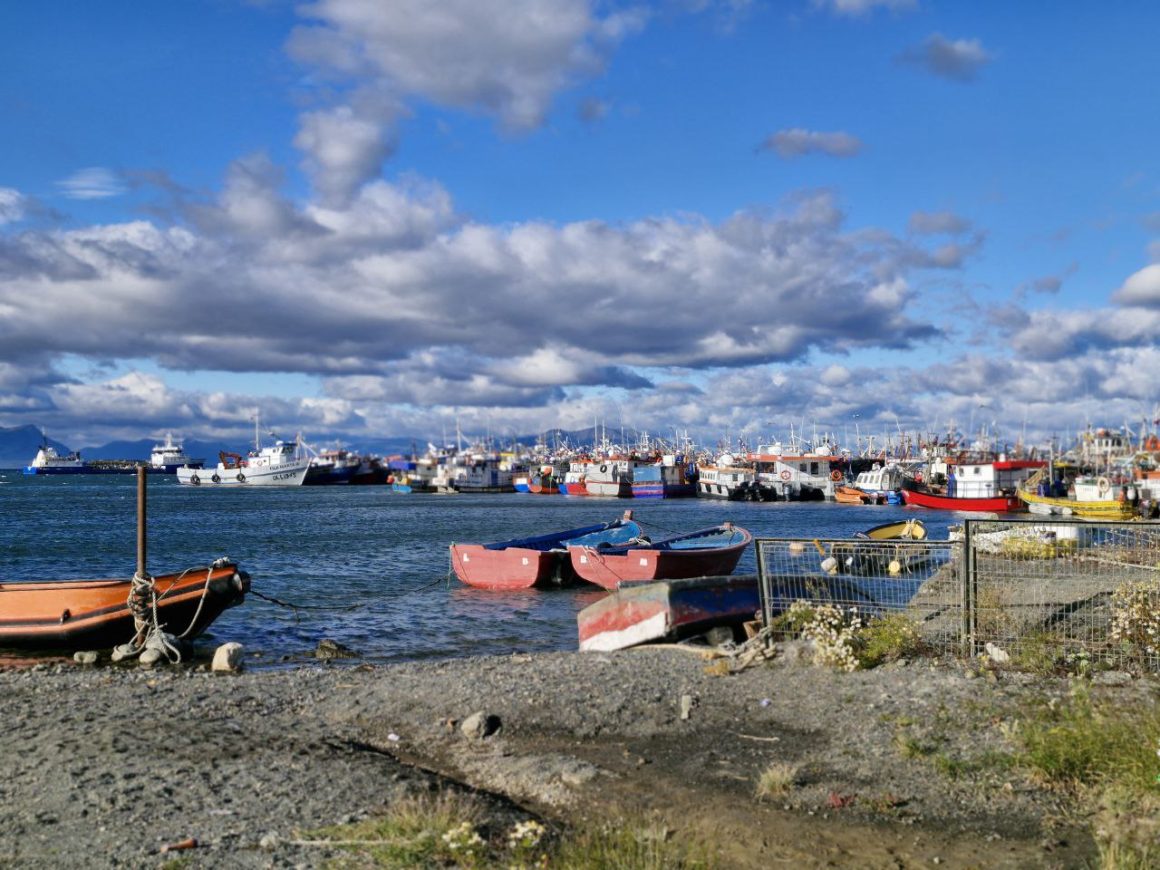
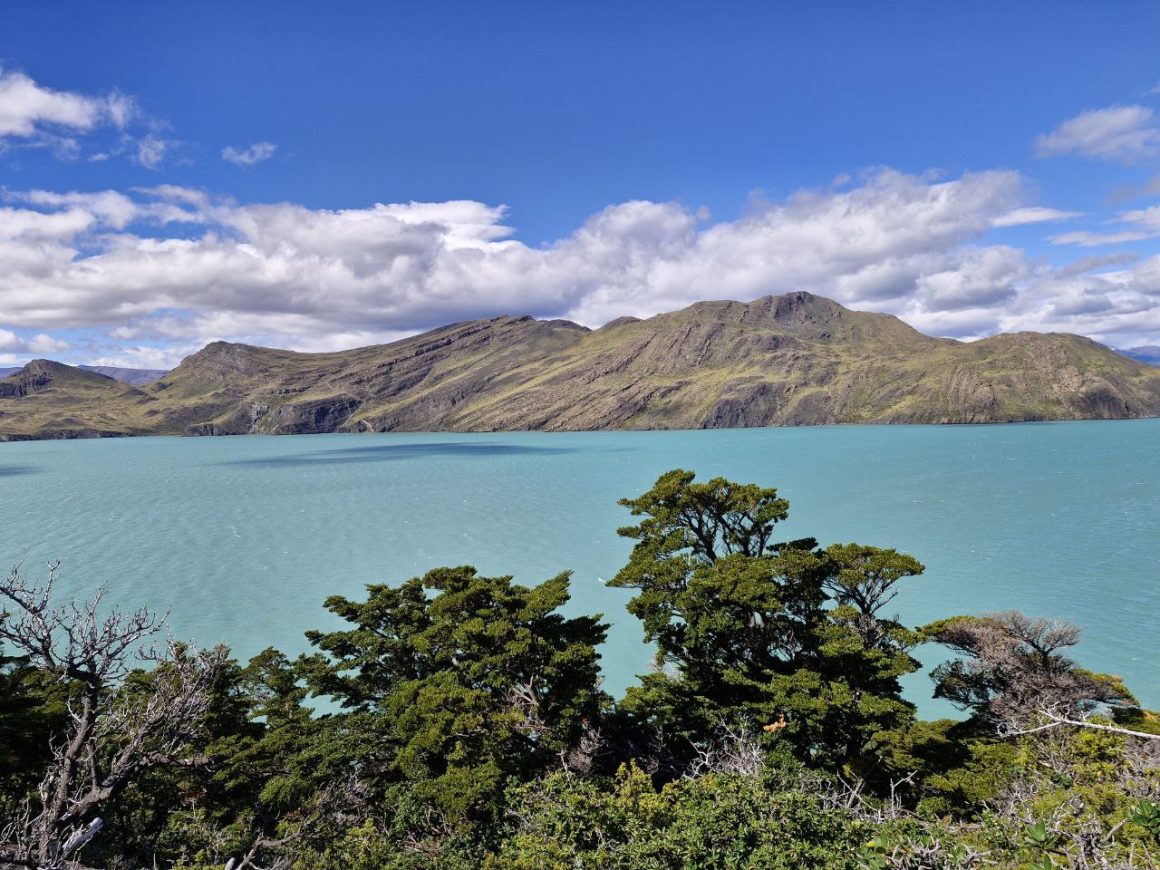
Patagonia is a land of relentless winds, untouched glaciers, mountain lakes, and dramatic ridges. Penguins and whales roam here. Llamas stand by the roadside lost in thought. Jules Verne’s heroes once searched for the 37th parallel in these very lands. Tiny port towns at the edge of the earth serve the most delicious Pisco Calafate — a cocktail named after the local berry. Ships depart from here to Antarctica.
And it’s here that backpackers from all over the world come to hike the W-Trek in Patagonia — the legendary trail through Chile’s Torres del Paine National Park that easily ranks among the top five hikes on the planet.
My own idea to do the W Trek was born a year ago, during my first visit to Patagonia from the Argentine side. The mysterious Torres towers and the dream of reaching them at sunrise took root in my head and never left.
When I was planning the trip and searching for any practical information on how to do the W-Trek independently, I was always grateful when someone had taken the time to write it all down. Here’s my contribution.)


When to Go: Season and Weather
The best time for the hike is the Patagonian summer — November through March. We had ideal timing: early February. The winds were supposed to be calmer, the nights warmer, the rain less frequent. And that’s exactly how it played out.
Daytime temperatures hovered around 55°F, the coldest night dropped to about 39°F, more often around 43°F, and it rained only once (but wow, what a rain that was!). Otherwise — sunshine and wind the whole time. When the sun beats down and you’re climbing a mountain with a full pack, you want to strip off everything. But the moment an icy gust kicks up, it cuts right through you.

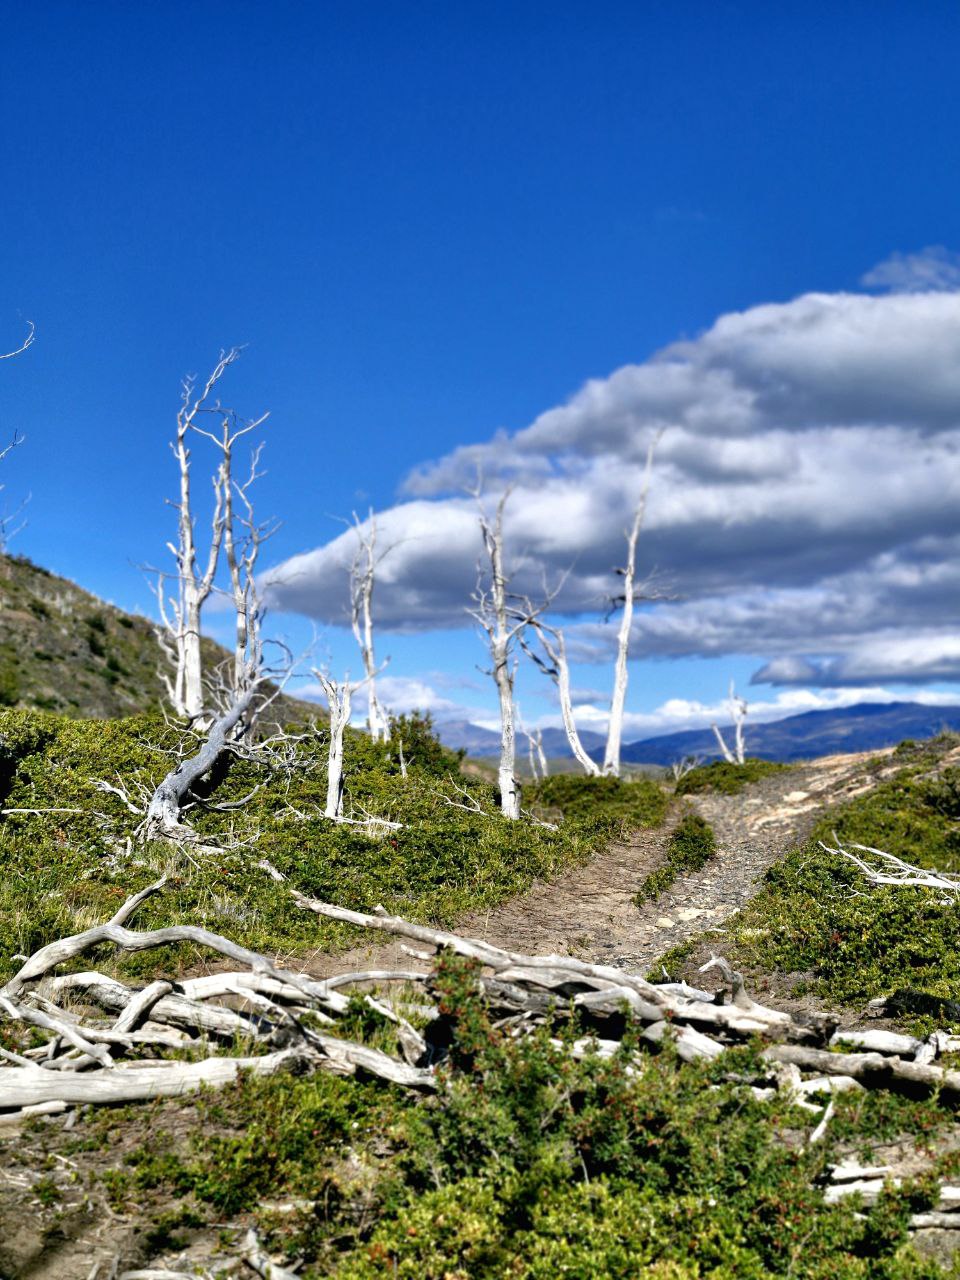
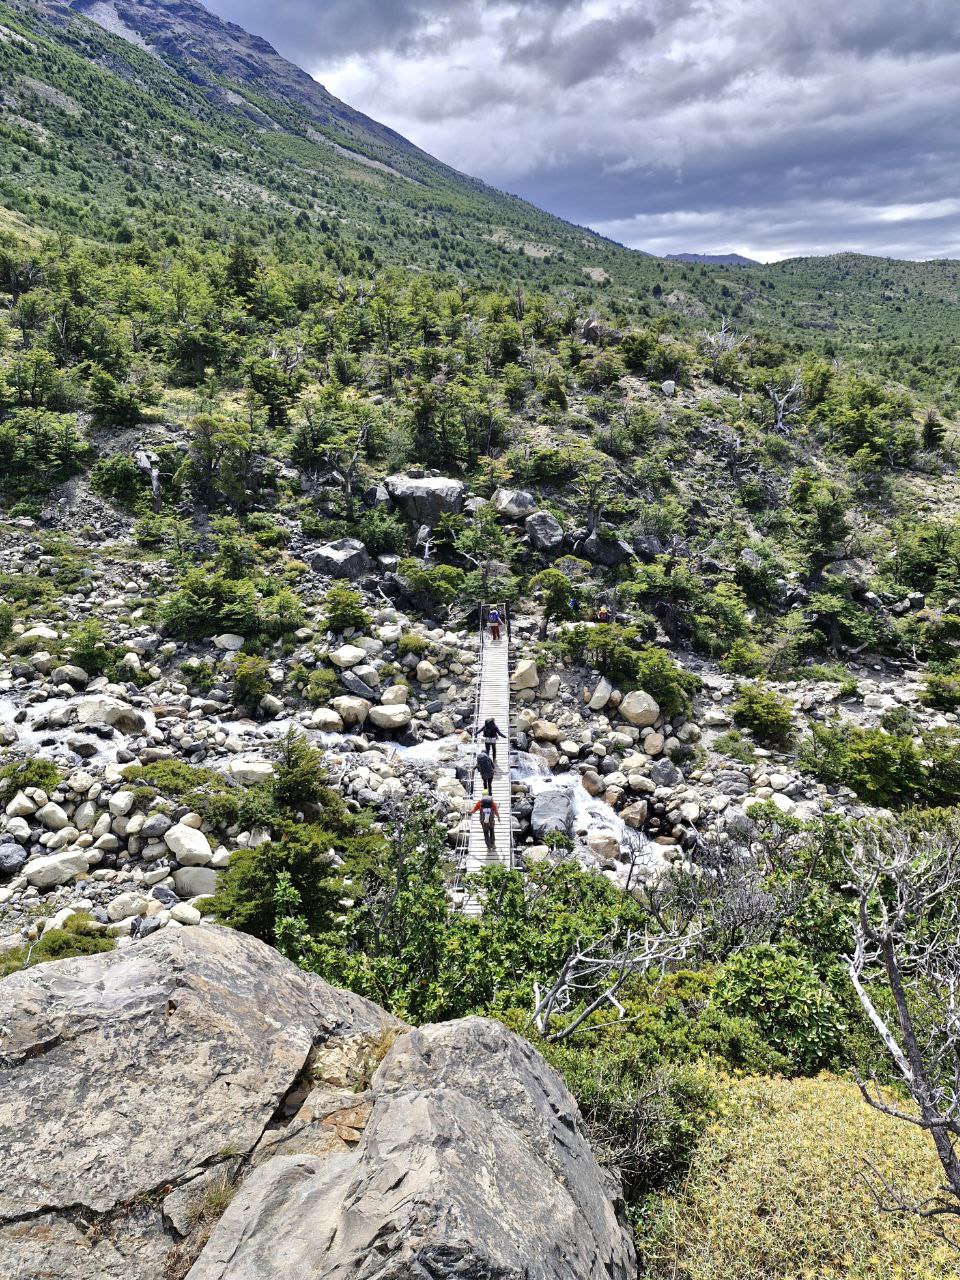
Who can do this trek: basically anyone who’s healthy and active, but showing up straight off the couch would be rough. The distances are serious, the pack is heavy, there’s a lot of climbing and descending, almost no paved surfaces, plenty of boulders, and in some spots mountain streams you’ll need to cross by hopping rocks.
In short, it’s worth adding some exercise to your life at least three months out — ideally gym work. My solid running fitness, for example, didn’t do much for the muscles that weren’t used to carrying weight and doing endless ups and downs. By day two, my shoulders and legs were begging for mercy.
Do You Need a Guide or a Group?
Not at all. I think anyone can handle this solo, at their own pace, with their own thoughts and zero distractions. The trail is well-marked throughout, and in the few spots where we still managed to wander off course, offline maps saved us (Maps.me works great).
Getting There
First, you’ll need to fly across the entire country from Santiago to the small town of Puerto Natales — the main gateway to Chilean Patagonia and Torres del Paine National Park. Several flights a day make the trip, which takes about 2.5 hours. Round-trip tickets ran around $250, plus roughly $30 per person for checked baggage.
Most people flying to Puerto Natales are there for exactly one reason, so you’ll be surrounded by enthusiastic fellow hikers with overstuffed packs even at the domestic terminal.
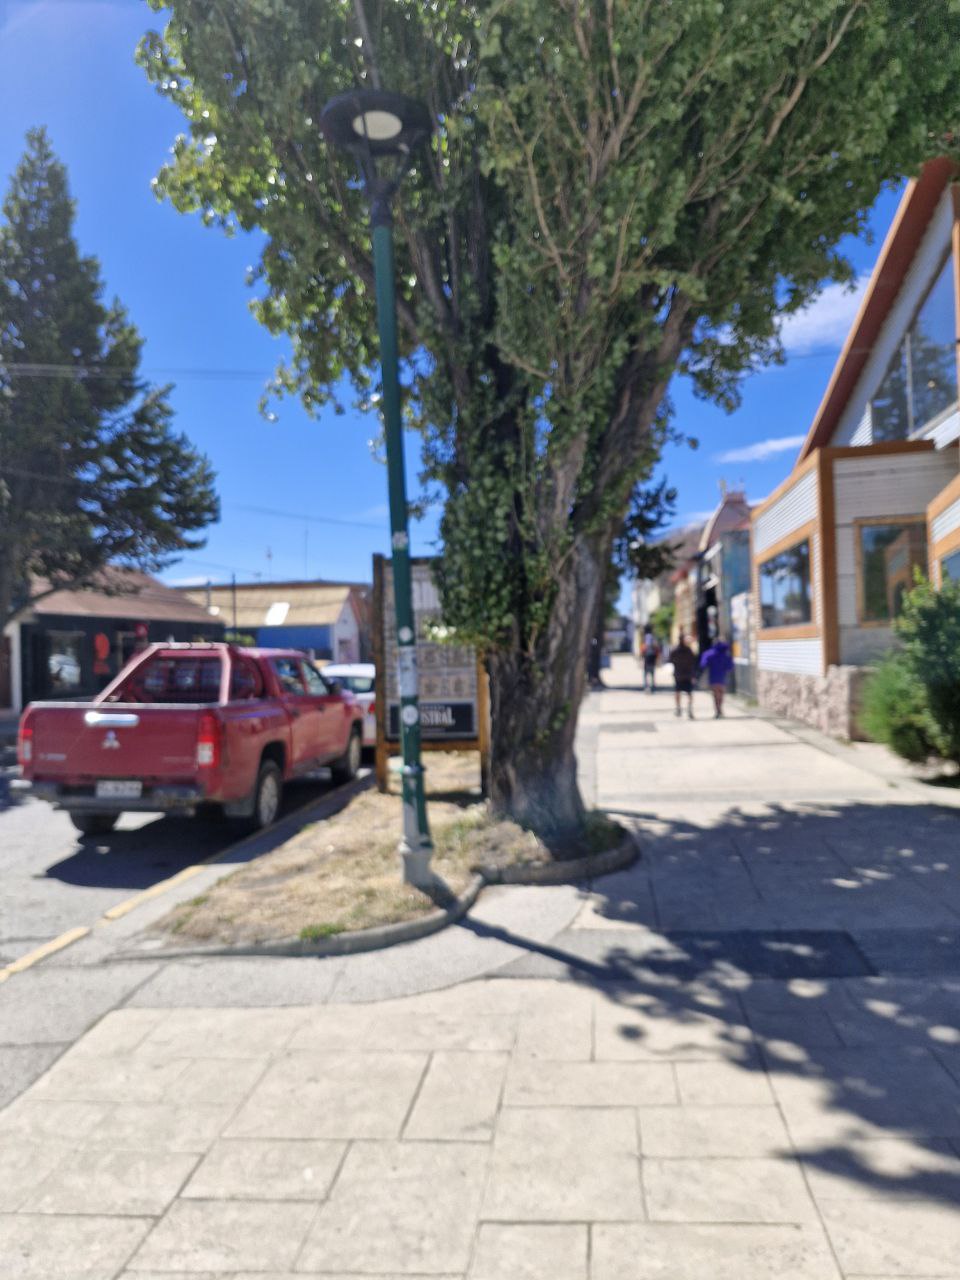
You can see the town in a day and pick up any gear you’re missing while you’re at it (trekking poles are non-negotiable, even if you think you don’t need them). There’s a rental shop right at the bus station — $25 for 5 days plus a $50 deposit they’ll refund immediately. It’s also the perfect time to hit a grocery store and stock up on food for the trail (more on that shortly).

The Start of the Journey
Here’s how our day one actually went: we landed in Natales at 10 a.m. after a 7 a.m. flight from Santiago. A 15-minute taxi ride took us to Hotel Martin Gusinde, where we’d already booked a room for our post-hike recovery (highly recommend — incredibly kind staff, comfortable beds, spotless rooms, an excellent breakfast, and a great central location). We repacked our bags, left the extras behind, grabbed food at the supermarket, and by 2:30 p.m. were already on the bus to Torres del Paine, determined to catch the last ferry at 6 p.m.
One helpful tip: if you have things you don’t want to carry on the trail, most hotels in Puerto Natales will hold your luggage for free while you’re out — they’re very used to hikers and completely understanding about it.

The W-Trek can be done west to east or east to west. We chose west to east, saving the grand finale — the climb to the Torres towers — for the last day.

Getting from Puerto Natales to the Park
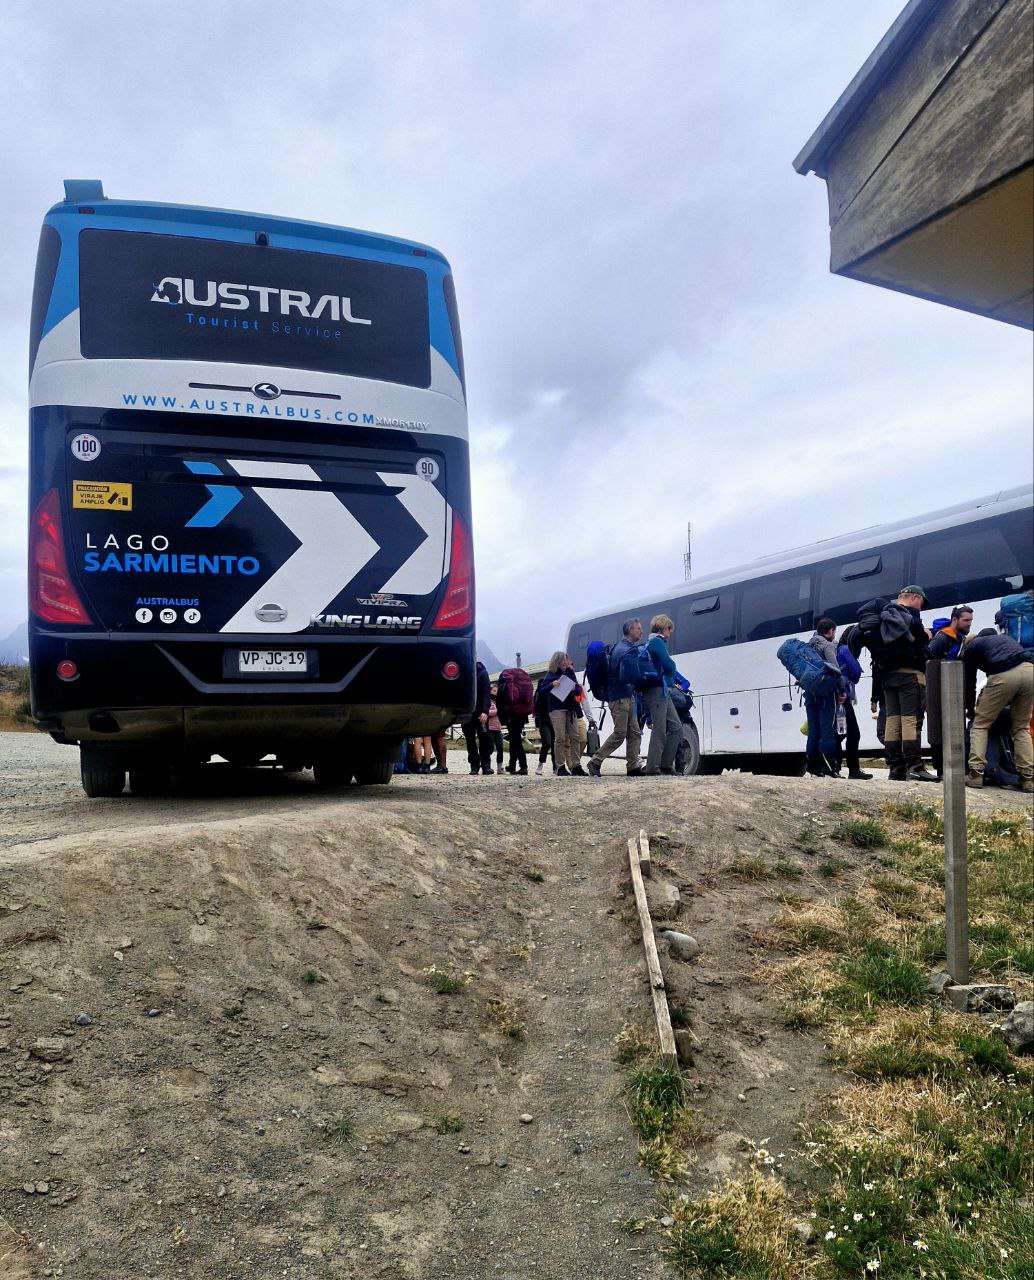
Buses leave from the Puerto Natales bus terminal (Av. España 1455) almost every hour from 7 a.m. to 4:30 p.m., heading straight to the park entrance. You can buy tickets at the terminal before departure, or in advance online through Bus Sur, Bus Maria Jose, Bus Gomez, or Buses Juan Ojeda.
You’ll also need a park entry ticket (around $15) — rangers check these at the entrance to Torres del Paine. It can be purchased online on the park’s website.

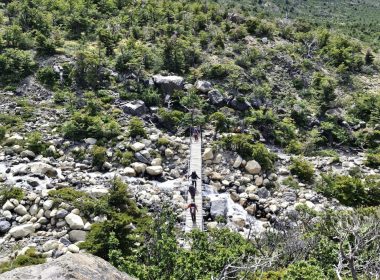
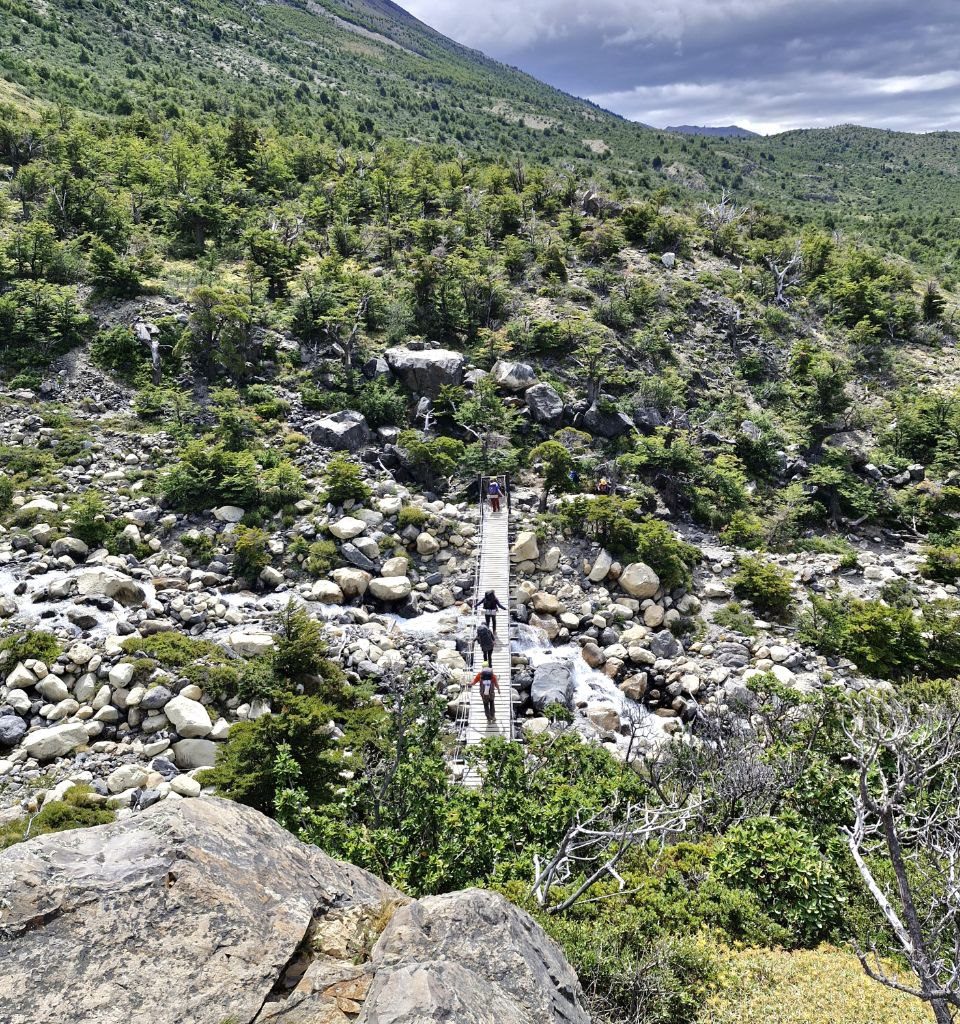
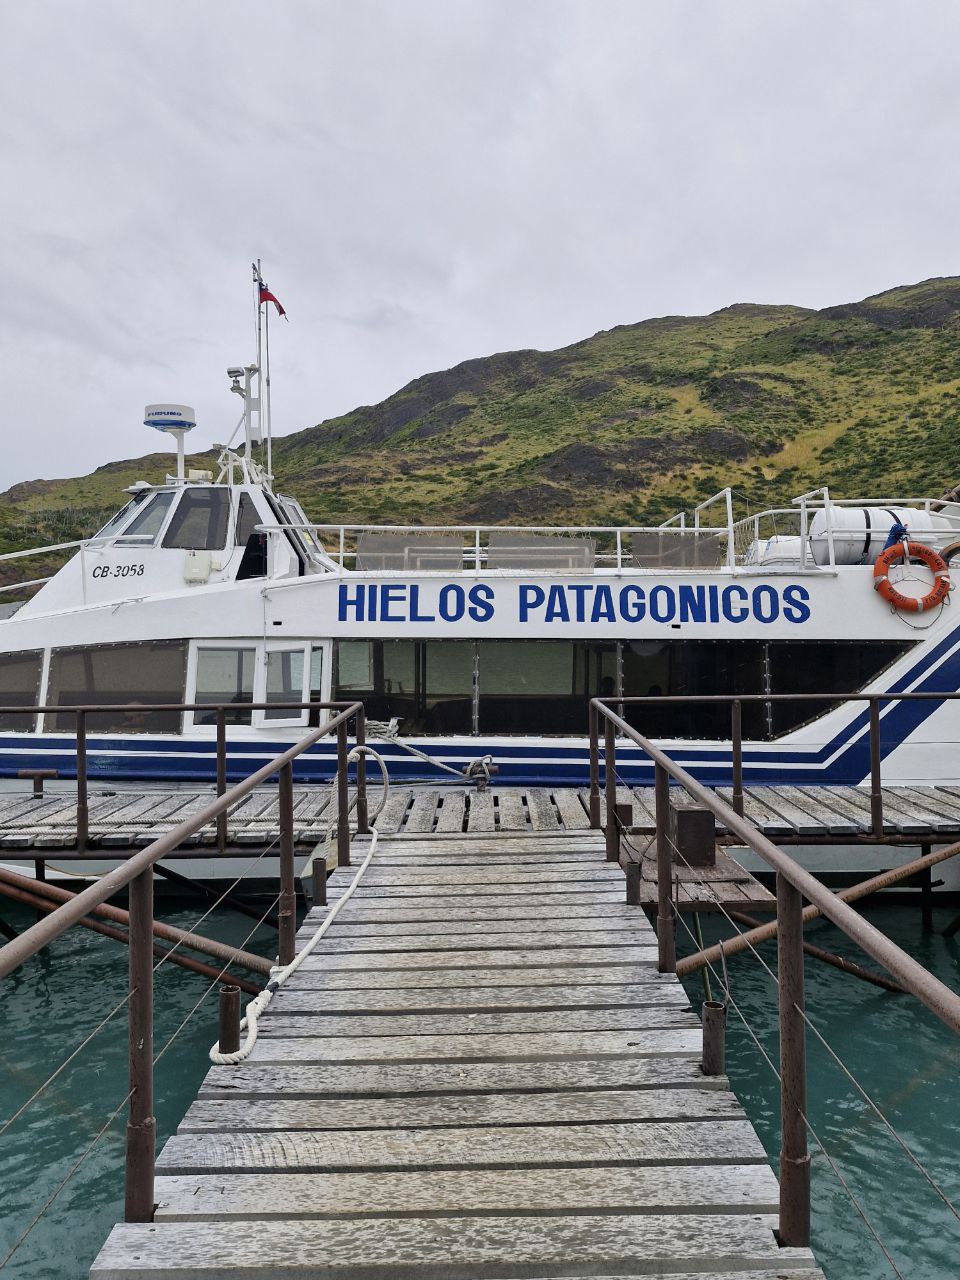
The bus ride takes about two hours, with a stop at the park entrance (Laguna Amarga). Here, some hikers doing the east-to-west route transfer to a shuttle. Those going west to east (like us) stay on the bus all the way to Pudeto. From there, a ferry brings you to the trailhead on the western side.
There’s also a third option. Take a different bus to another laguna and catch a separate ferry directly to Camp Grey — and start the hike from there. That would have been the smarter move for us, but we found out about it too late.
From Pudeto, you board the ferry to your first camp — Paine Grande. Buy your ferry tickets online in advance and check the schedule ahead of time. During high season, four ferries run daily: 9:00 a.m., 11:00 a.m., 4:15 p.m., and 6:00 p.m. The ride takes about 45 minutes. The mountain views from the water are already stunning — and you’ll be walking through them soon.
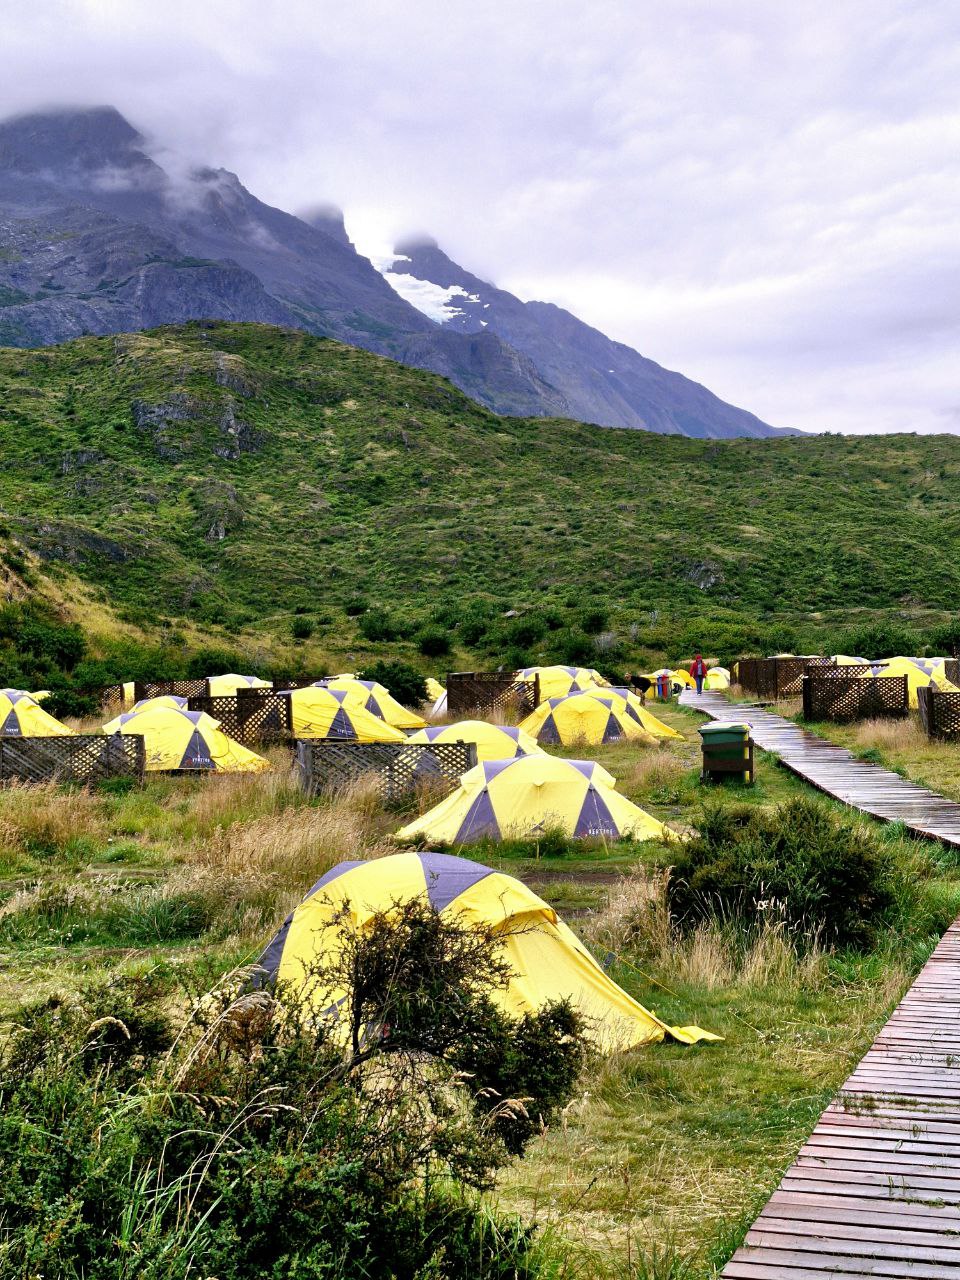
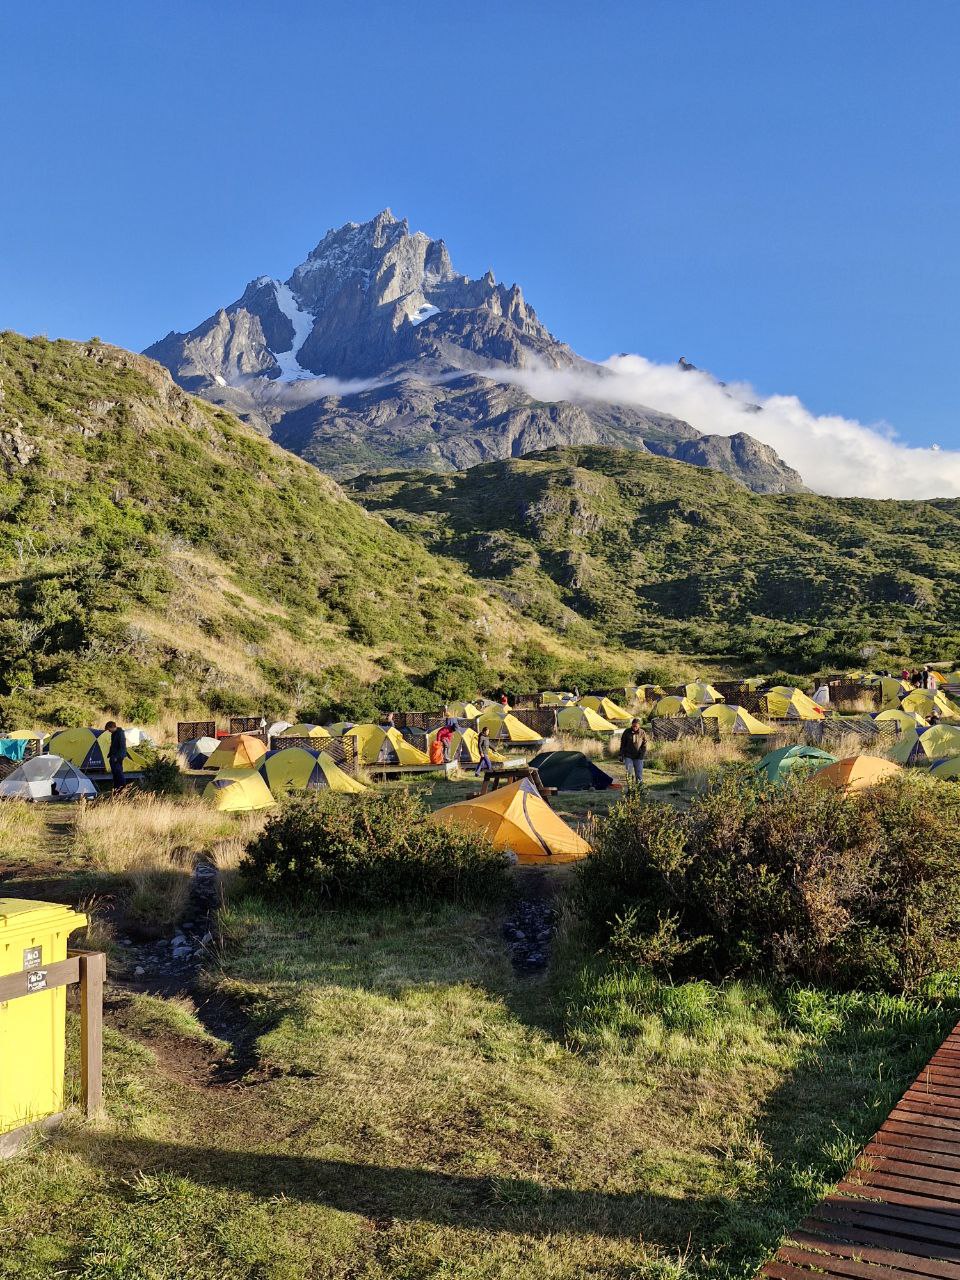
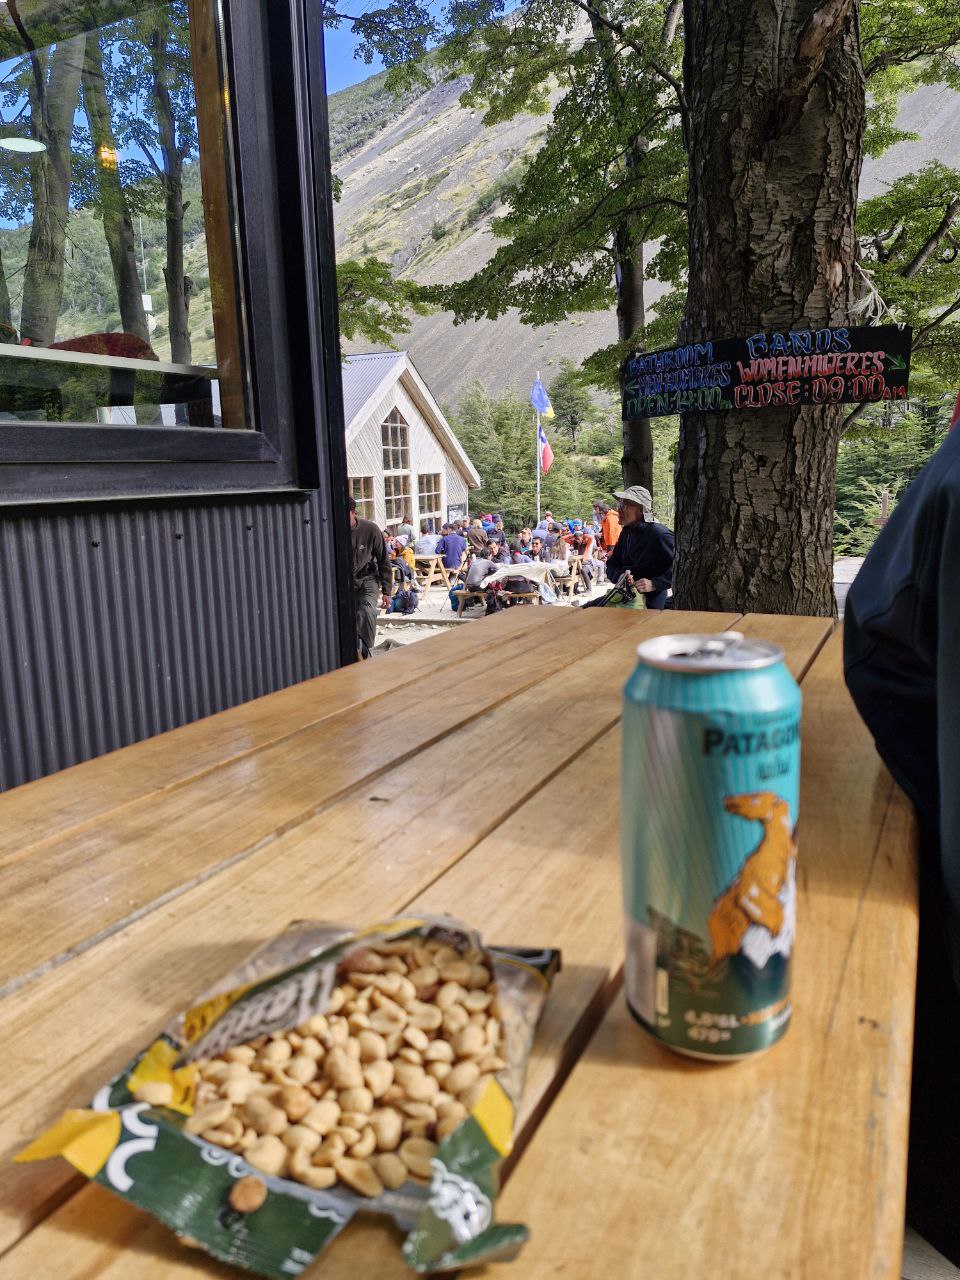
Then comes check-in at Paine Grande, the jaw-dropping sight of bright yellow tents glowing in the rain against a massive mountain backdrop, dinner with wine at the campsite’s buffet restaurant ($50 per person), a hot shower (which shuts off at 10 p.m.), and a deep sleep in your sleeping bag to the sound of rain tapping on the tent.
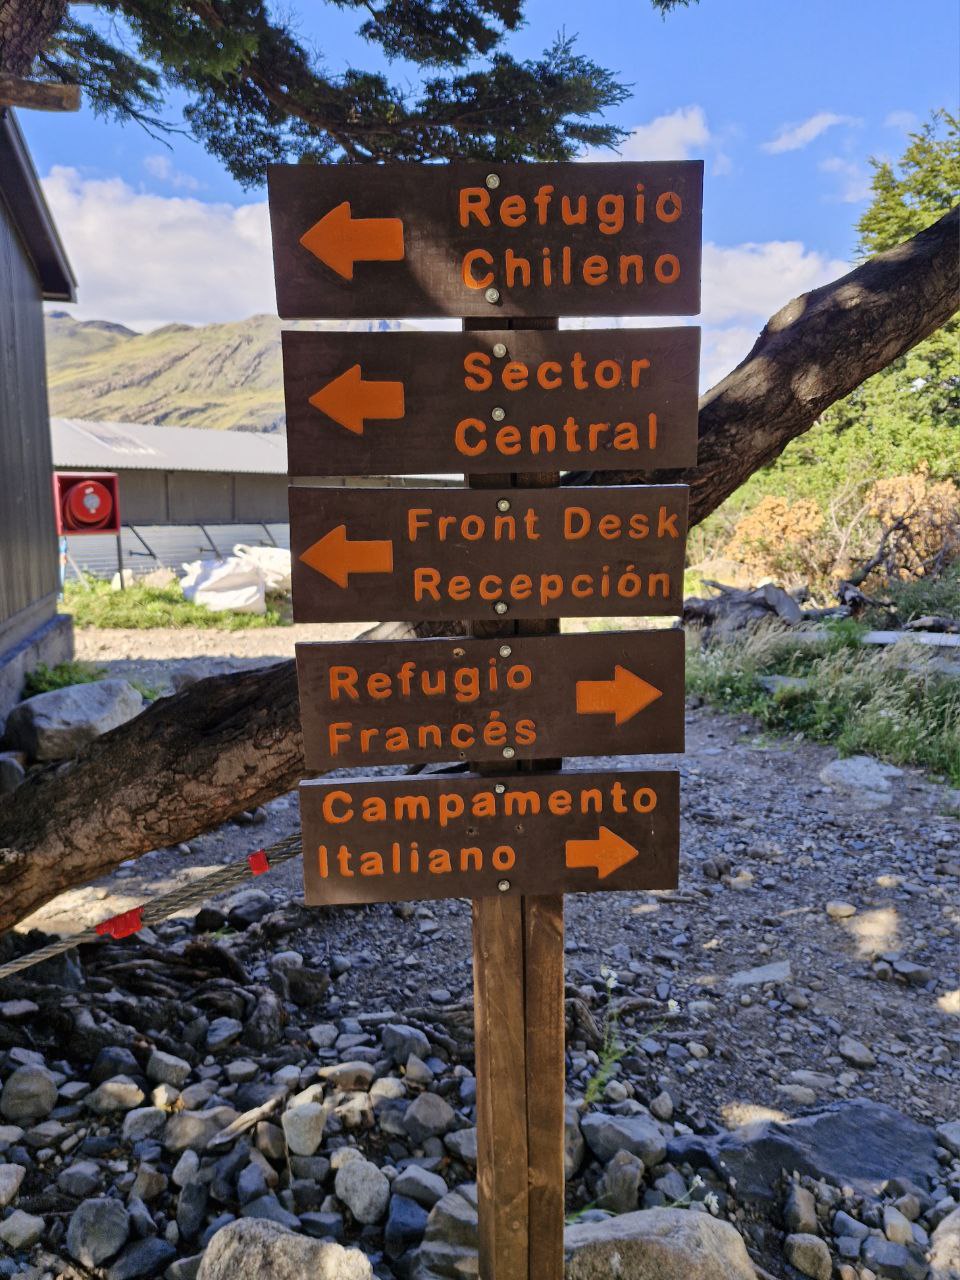
Campsites and How to Book
Most campsites on the route are split between two companies: Vertice Patagonia (camps Gray and Paine Grande) and Fantastico Sur (camps Frances, Los Cuernos, Central, and Chileno). One campsite — Camping Italiano — remains free and is managed by CONAF. All camps have bathrooms and hot showers for a few hours each evening.
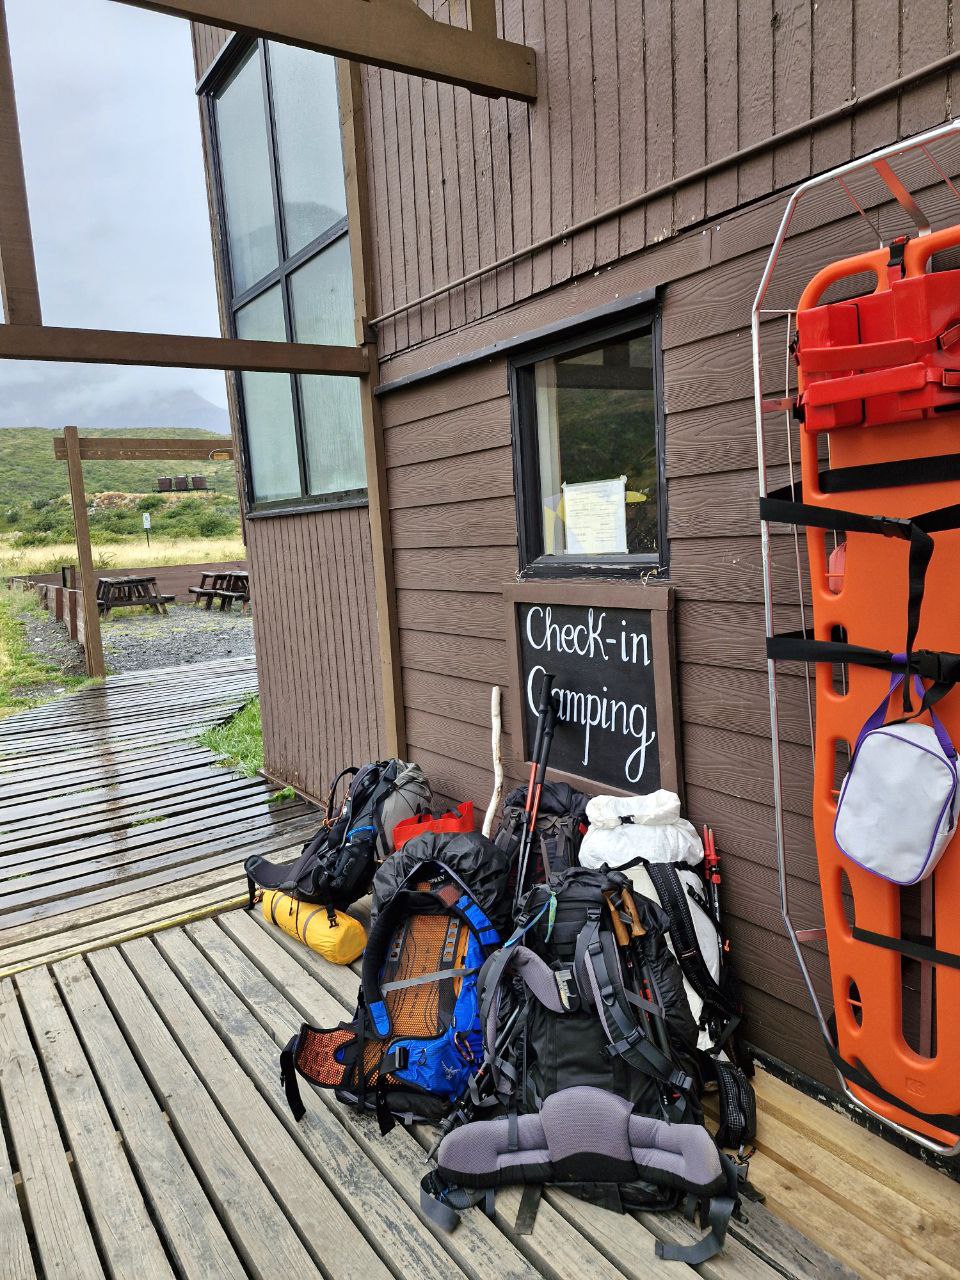
Book well in advance — ideally several months out — directly through each company’s website. Accommodation options include tent sites, refugios (hostel-style shared rooms), and private hotel-style rooms. The private rooms go fastest, and when we booked — just a month before the trip — the only option left was a basic tent site.

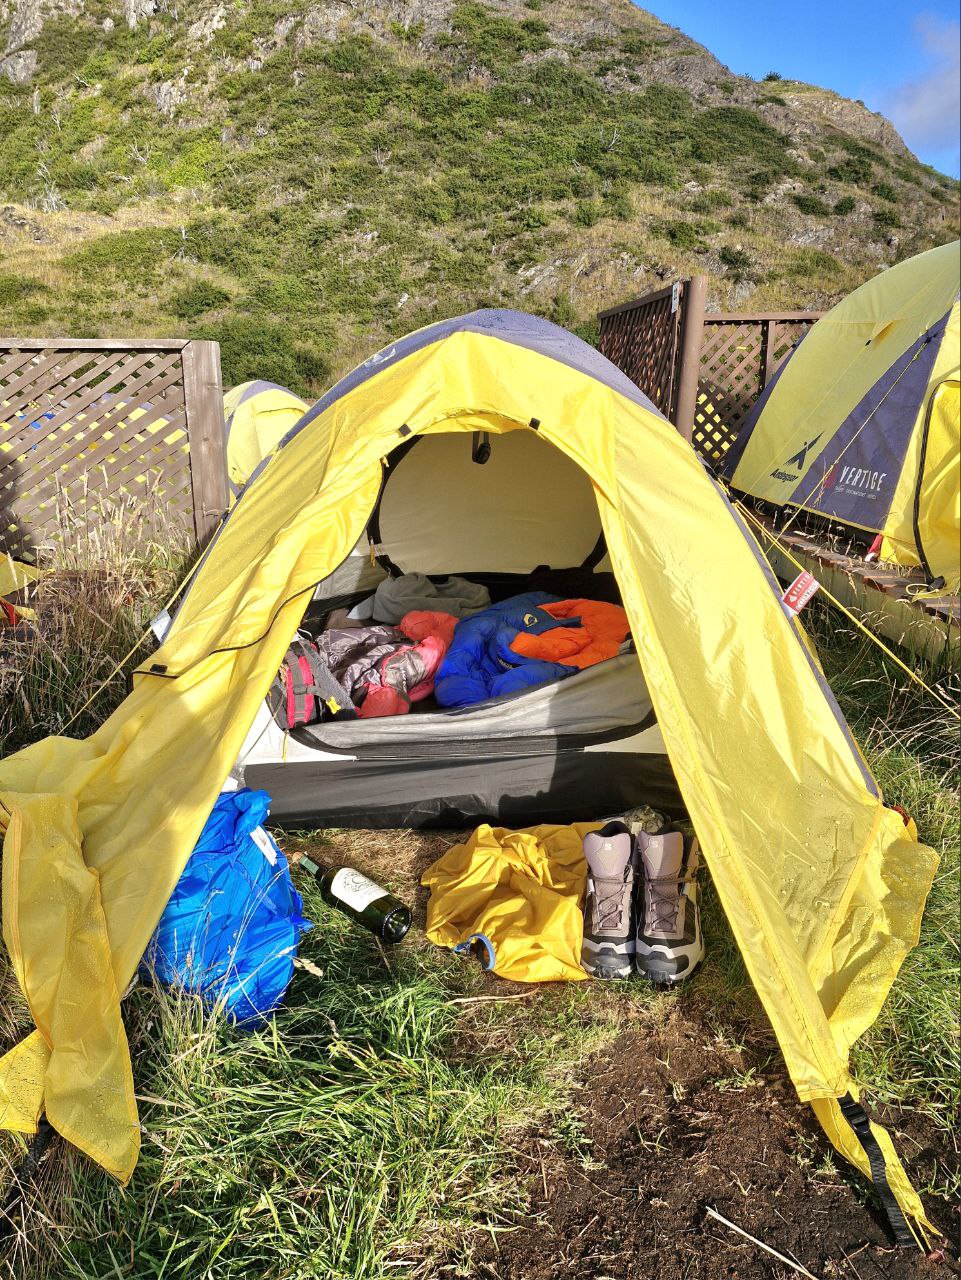
Bringing your own tent costs $15 per night. Renting one on-site adds another $30. Sleeping bags, pads, and pillows are available to rent too. We rented the tent and carried everything else ourselves.
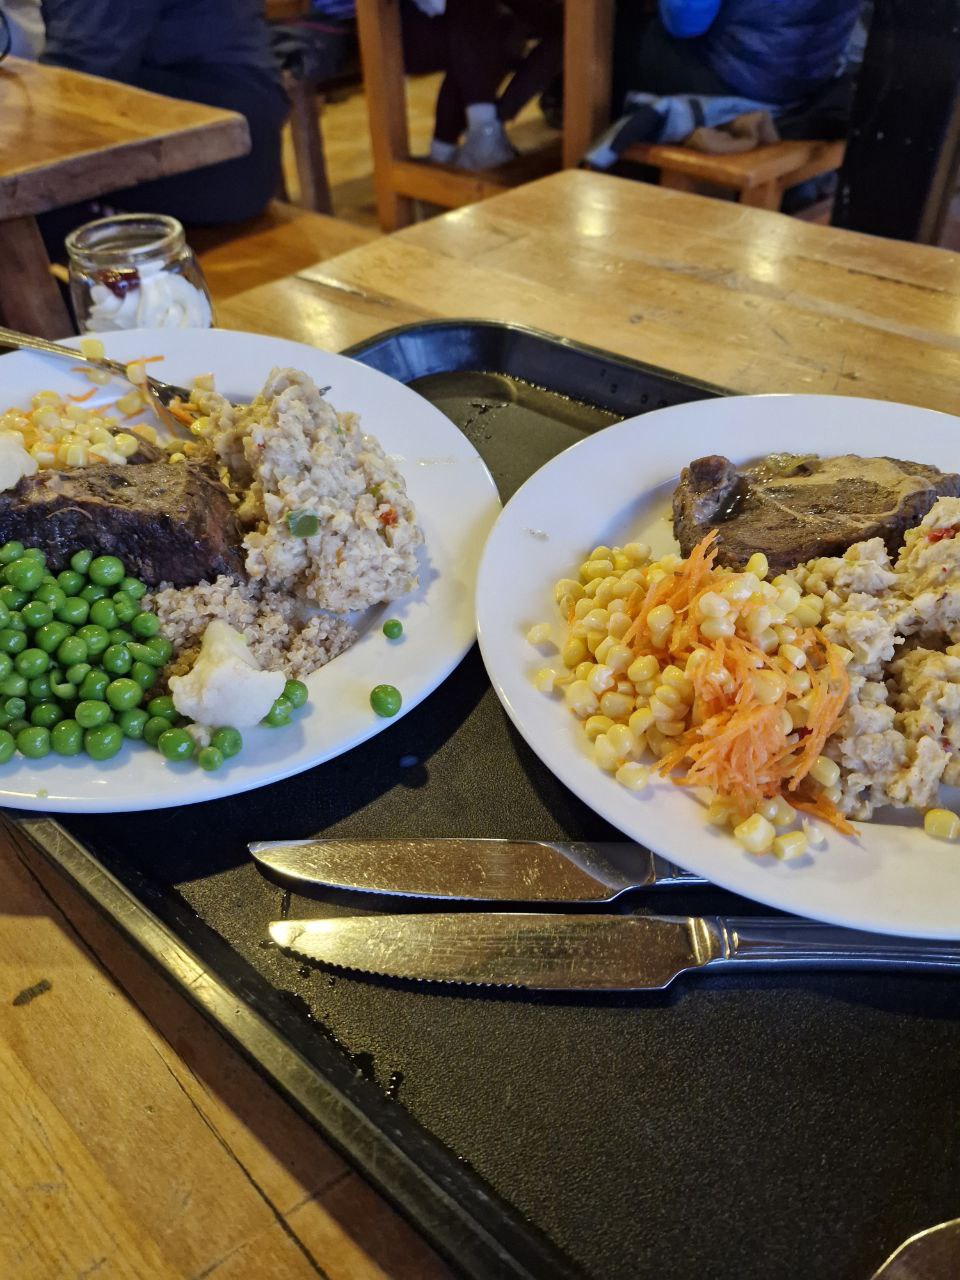
When booking, you can add breakfast ($30 per person) and dinner ($50). Or bring a camp stove and cook your own food. Most people go that route.
The cooking shelter at each campsite is one of the liveliest spots on the trail. Everyone’s cheerfully making pasta, brewing coffee on little stoves, cracking open beers from the camp store. You can skip pre-booking meals and add them at check-in. We were too nervous about food to do that — we paid for everything upfront.
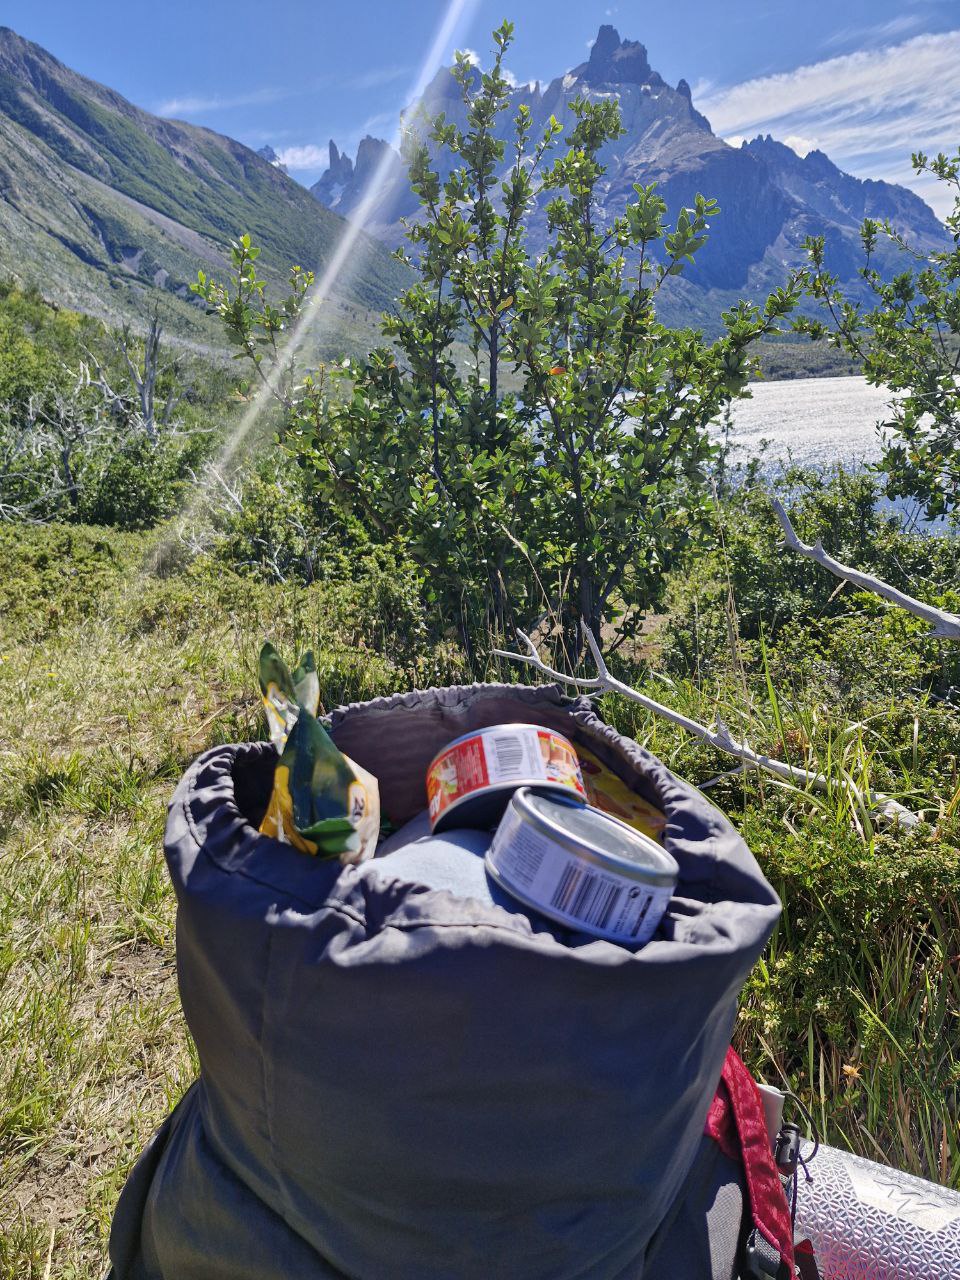
On top of that, we panic-bought a mountain of snacks, canned goods, nuts, and chocolate in Puerto Natales. In hindsight — total overkill. All of it was available at camp stores along the way. We didn’t need to haul it from day one. No one goes hungry out here.


Good to Know
Torres del Paine has two main trails: the O-Trek, a full loop named for its shape, which takes about 10 days and is more demanding. And the more popular W-Trek — essentially the lower half of the O. Campsites are spaced out for roughly 9–12 miles per day.
There are some side trips along the way, but the workload is manageable. The full W can be done in 6 days and 5 nights — or, if you push the pace (like we did), in 5 days and 4 nights. If you have the time, don’t rush it. Seriously, you came all this way — enjoy every step of it.
There is zero cell service on the entire route. None whatsoever.
That said, each campsite has a machine where you can buy decent Wi-Fi with a card — no problem there. There’s a multi-day pass (5 days for $70), plus hourly and daily options that work out to more per day. But step a hundred yards from camp and you’re completely off the grid. Just you and some of the most magnificent nature on Earth. Total digital detox. Which was, of course, exactly the point.
Every campsite has a small shop selling snacks, wine, beer, maps, and souvenirs. Cards are accepted everywhere — we never once needed cash.
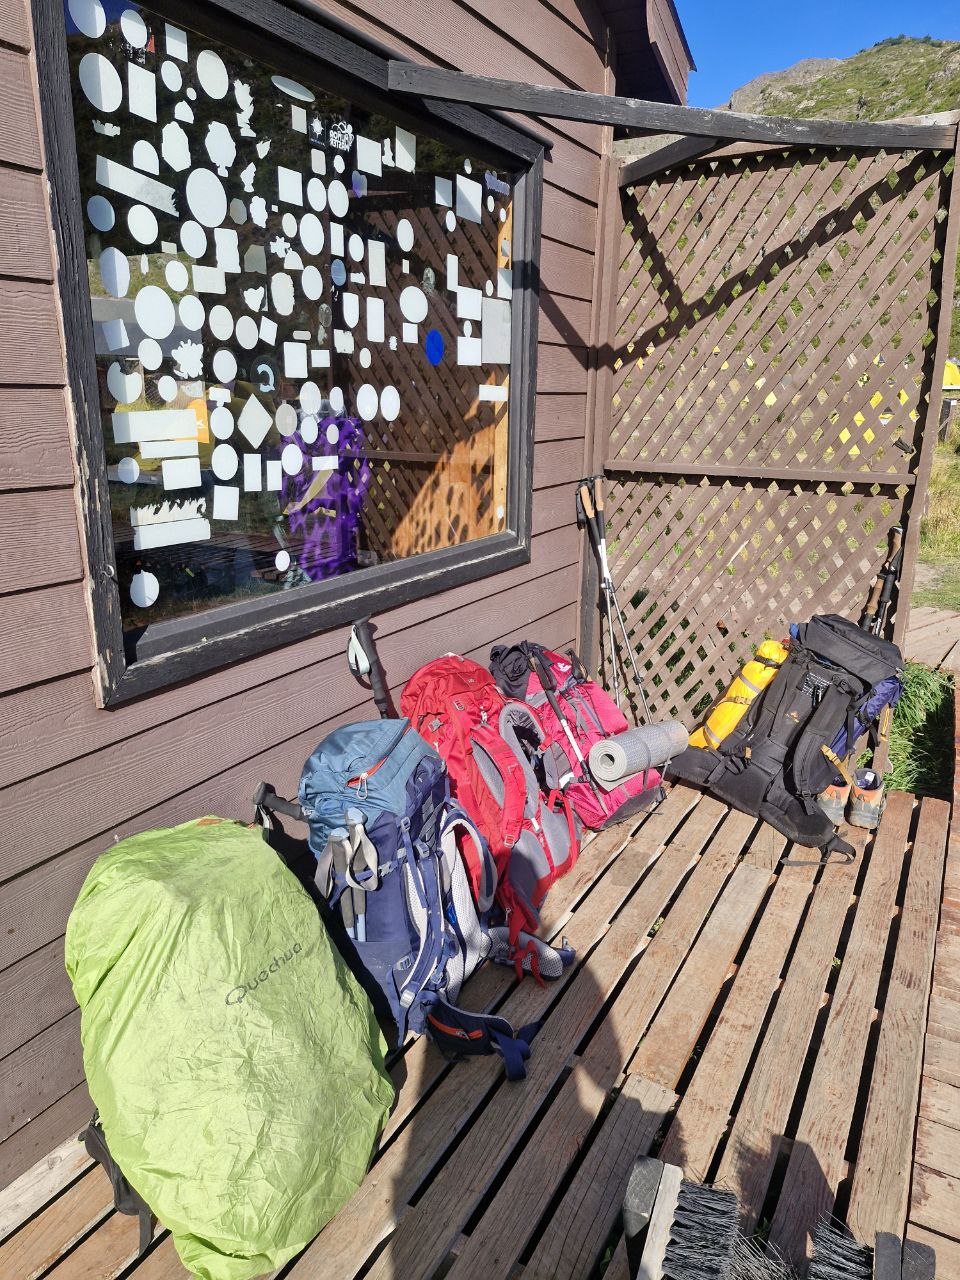
What to Pack
We had 60-liter packs, and they felt completely stuffed, yet the idea of going bigger (and heavier) felt impossible. Looking back, I’d probably skip bringing my own sleeping bag next time and just rent one at camp for $25 a night.
Be ready for weather that changes fast and with zero warning. You’ll be layering and de-layering many times throughout the day.

Clothing list:
- Solid hiking boots that fit properly — one full size up from your regular size, at minimum
- Main hiking pants, plus a second pair — the first will be filthy within a day
- Light pants for camp — the first thing you’ll want to do after a long day is peel everything off and put on something clean
- A few lightweight long-sleeve base layers that can work as either a base or a mid-layer
- One warm zip-up fleece with a high collar
- A windproof shell jacket
- Something insulating — a down vest or warm jacket
- A couple of T-shirts, several pairs of socks, and underwear
- A beanie — specifically for the Torres summit push. I ended up wearing a baseball cap the whole rest of the trip; the beanie was too warm
- Shorts — a few days were surprisingly hot
- A neck gaiter for the wind
- Flip-flops — don’t be like me and forget these. Walking around camp in sandals after 12+ miles in hiking boots is pure bliss, and not having them is genuinely painful
- A rain jacket
- A pair of casual shoes for camp (sneakers work)
Other useful things: a small daypack for side trips, wet wipes, a pocket knife with a corkscrew, a metal mug with a carabiner clip. If you’re cooking: a camp stove, fuel canister, and deep bowls. A basic toiletry kit, a first-aid kit, and sunscreen — the sun here is intense.
Skip the SPF and you’ll be heading home with a burned face. A quick-dry microfiber towel, a headlamp, a power bank (charge it every night at camp), a reusable water bottle, and sunglasses. That’s pretty much it.
Day-by-Day Breakdown
Day 1
Travel day: fly from Santiago to Puerto Natales, bus to the park, ferry to Paine Grande, first night at camp.
Day 2
25 km / ~9 hours Paine Grande → Glacier Grey → Paine Grande. A out-and-back day trip to the glacier. The upside: we left our big packs at camp and hiked light. The downside: we had to cover the same ground twice. A smarter move would’ve been to start at Camp Grey from the beginning — getting there just requires a slightly different route in.


Day 3
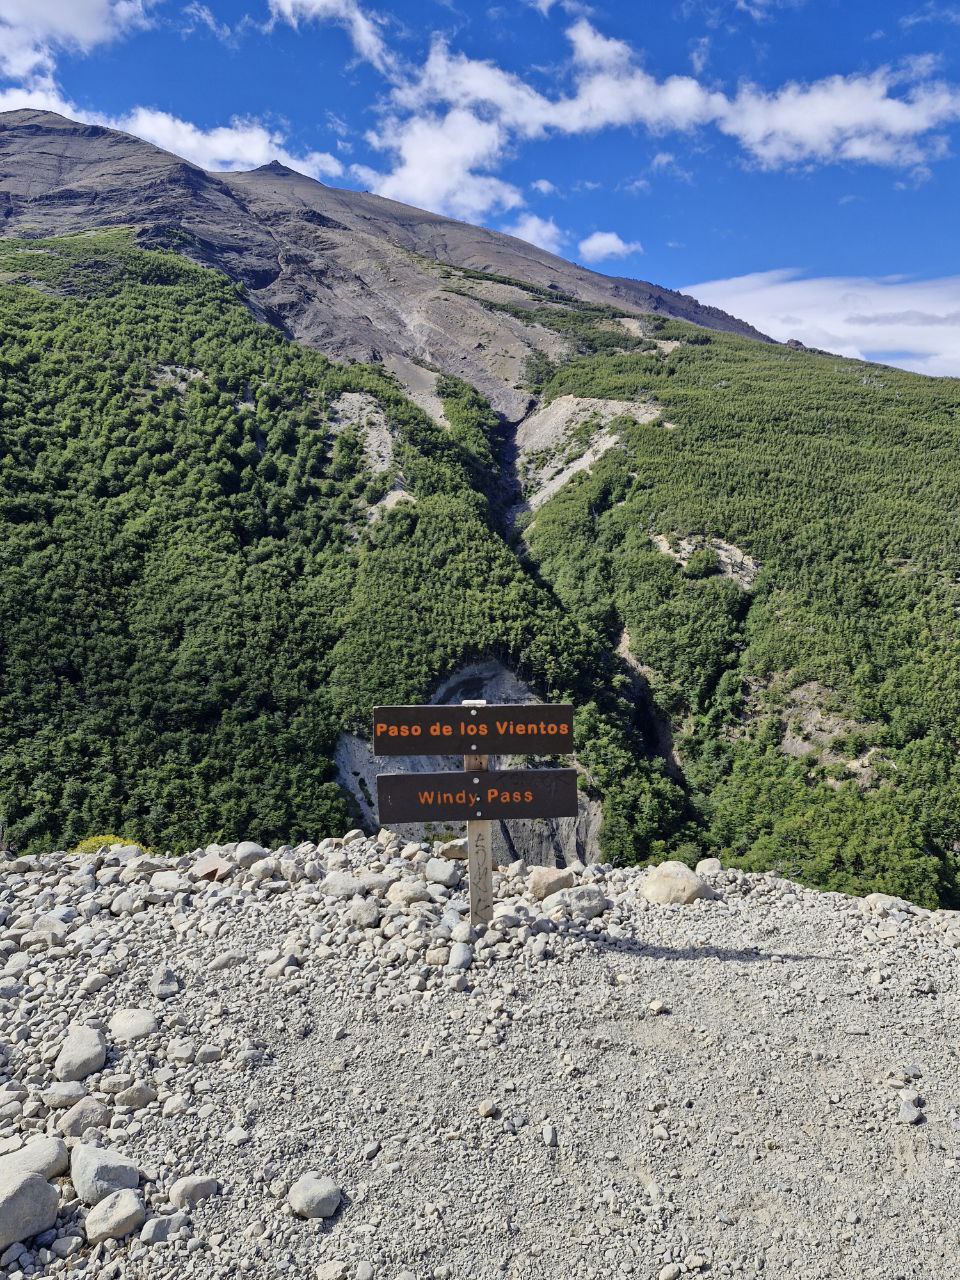
18 km / ~8 hours Paine Grande → Camp Frances, with a side trip up to Mirador Britanico. The stretch between camps is about 6 miles on relatively easy terrain, but the mirador involves real climbing. A popular strategy: stop about a mile short of Frances, drop your pack near the ranger station, hike light to the Britanico or Frances viewpoints, then pick up your gear on the way back.

If you go this route, budget at least 8 hours. That means leaving no later than 9 a.m. In February, sunset is late — after 9 p.m. — but arrive at camp too late and you’ll miss dinner, the hot shower, and any chance of rest.

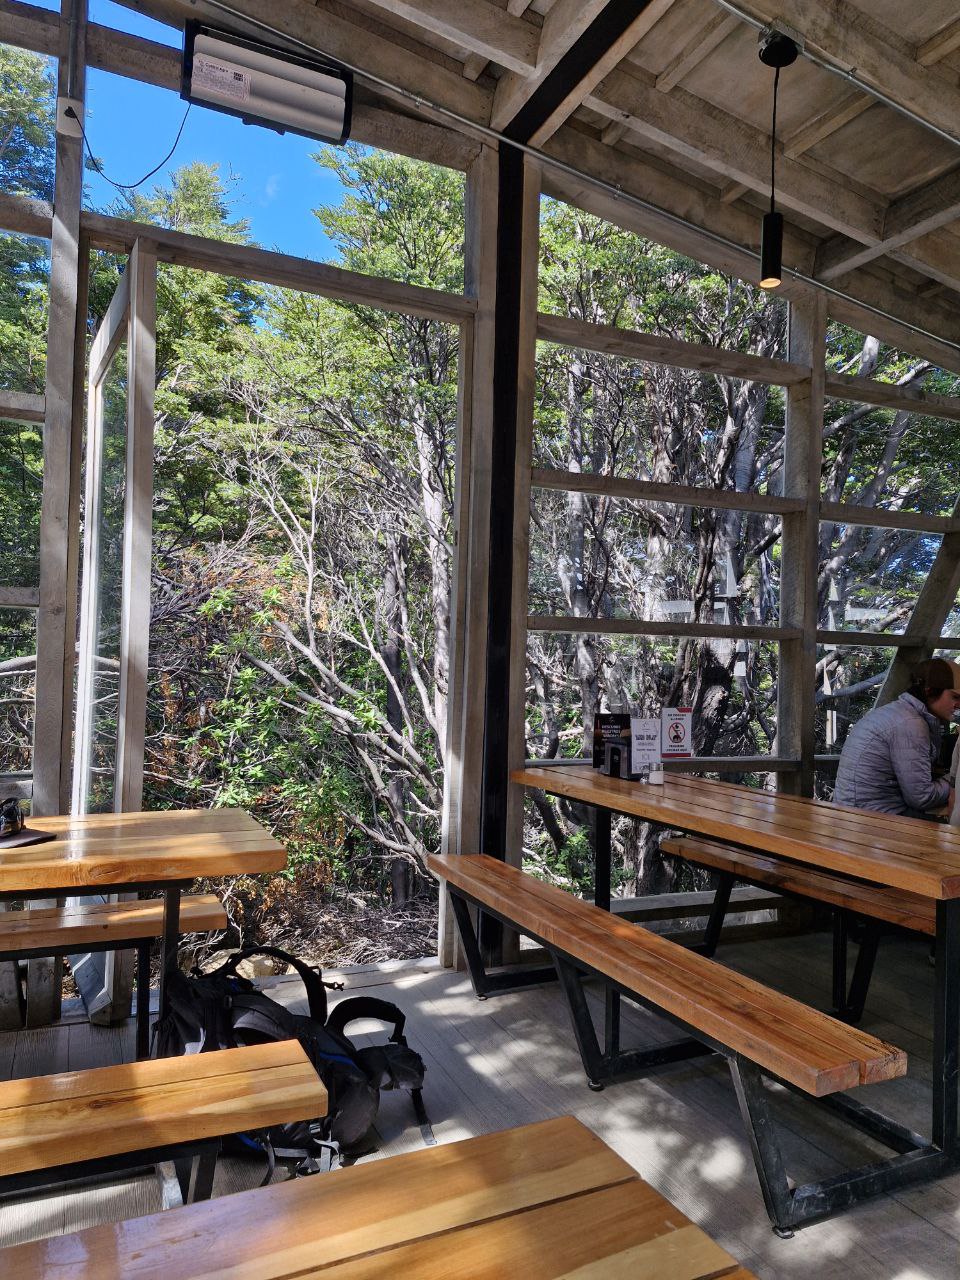
The Frances campsite is a highlight in itself — quirky tents perched on tall stilts that you climb into via a vertical ladder. There’s a great shower (hot water until 9 p.m. only) and a tiny, buzzy little café-bar where everyone packs in at night to decompress over a glass of wine.
Day 4
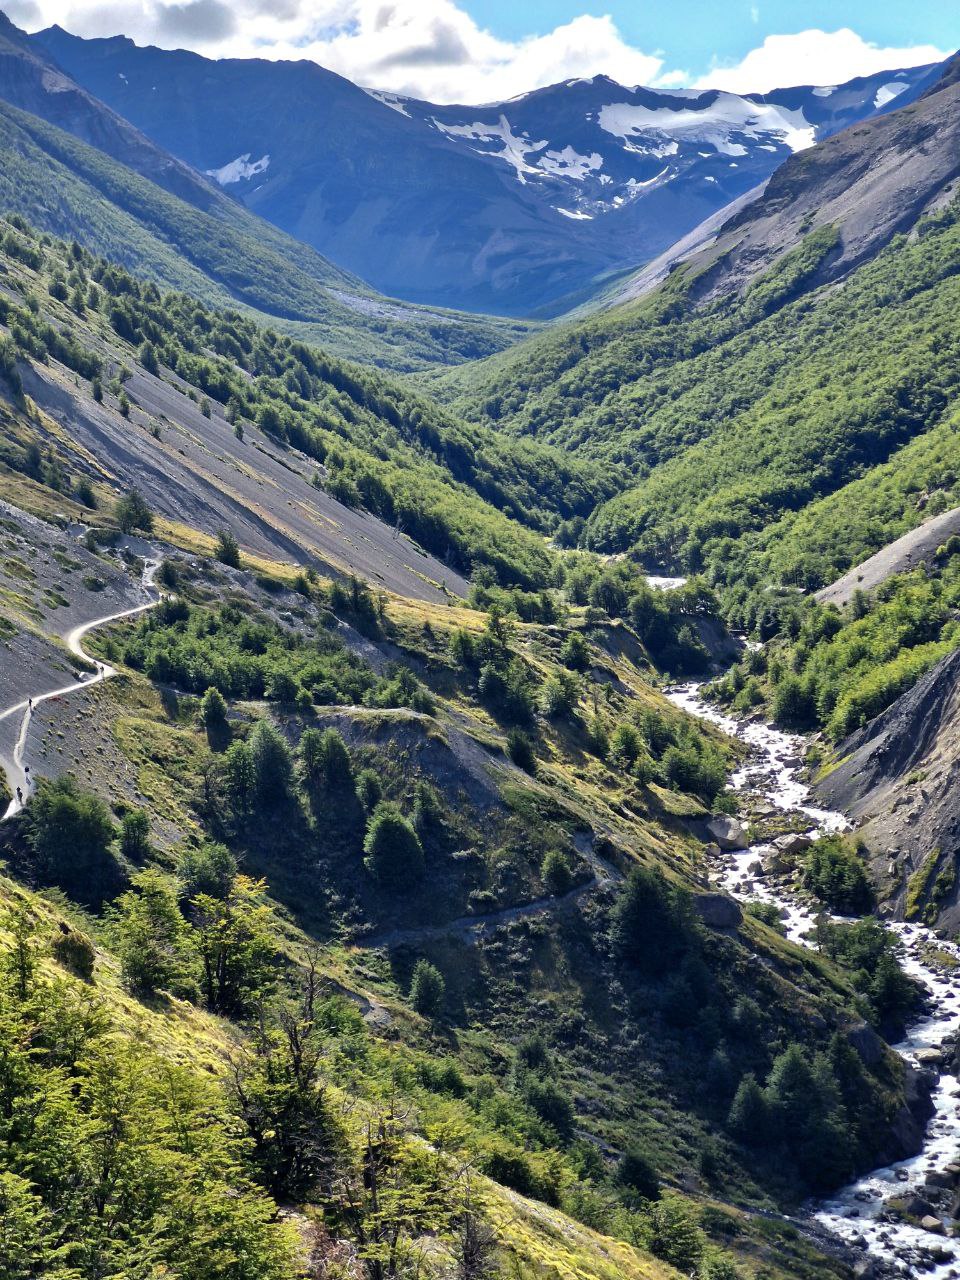
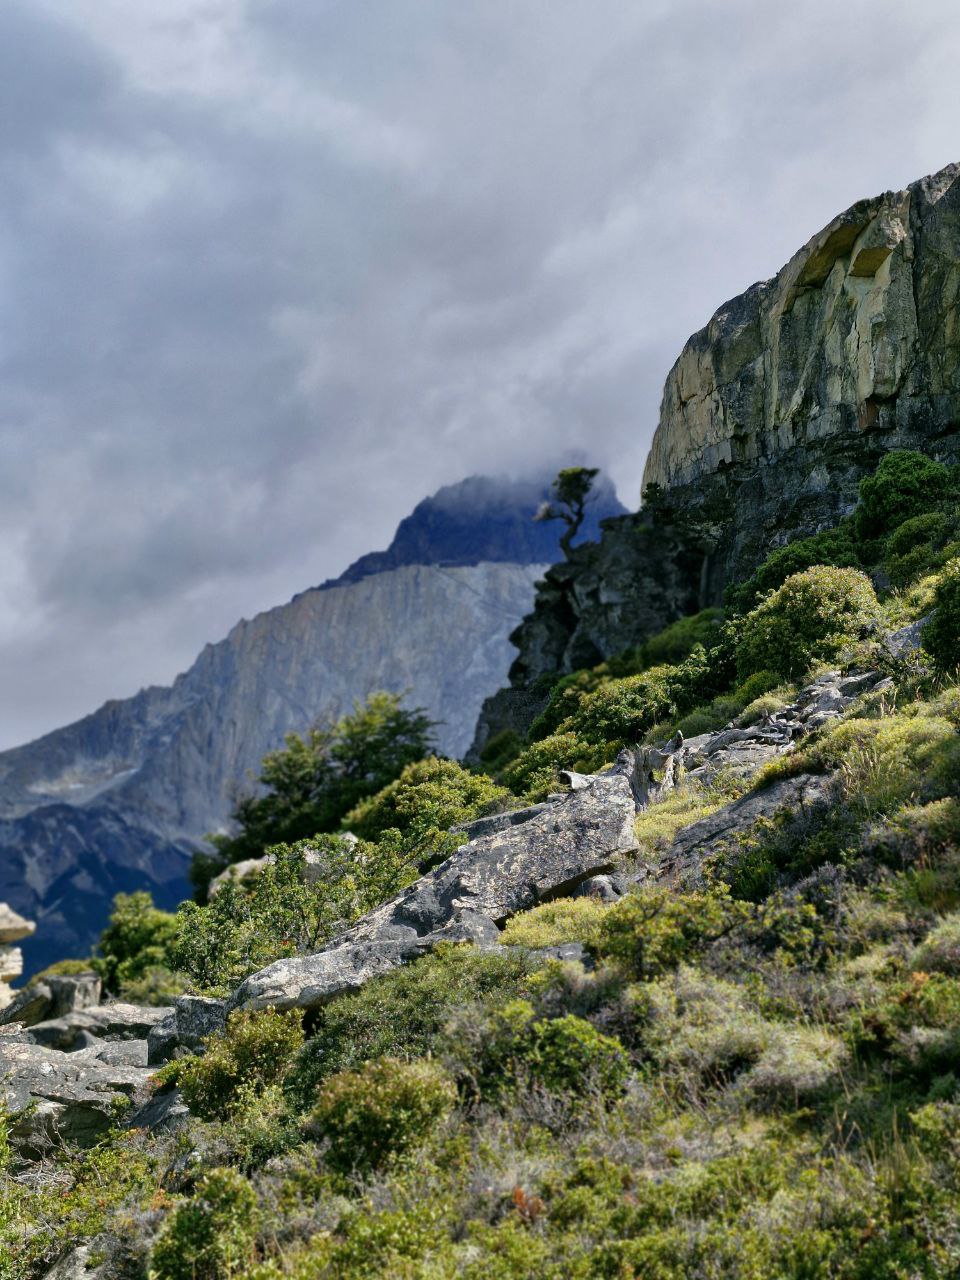
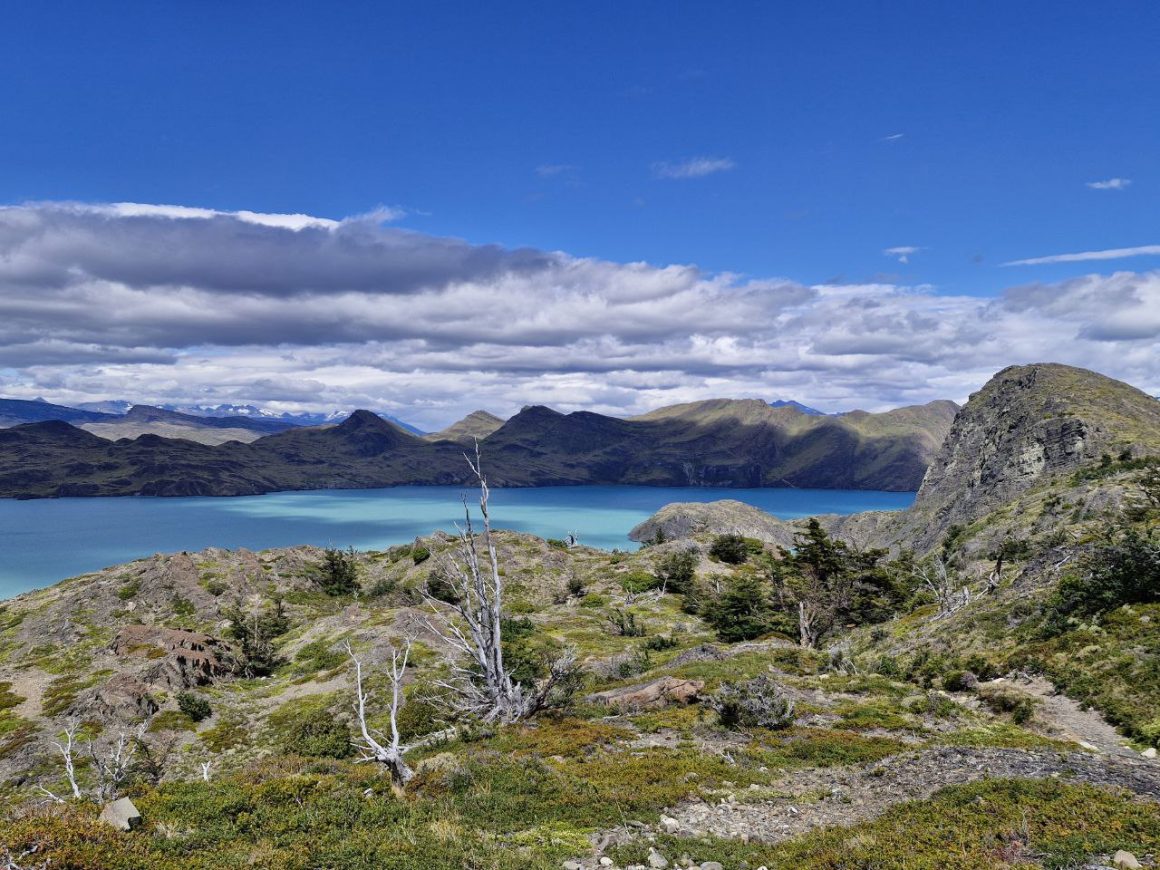
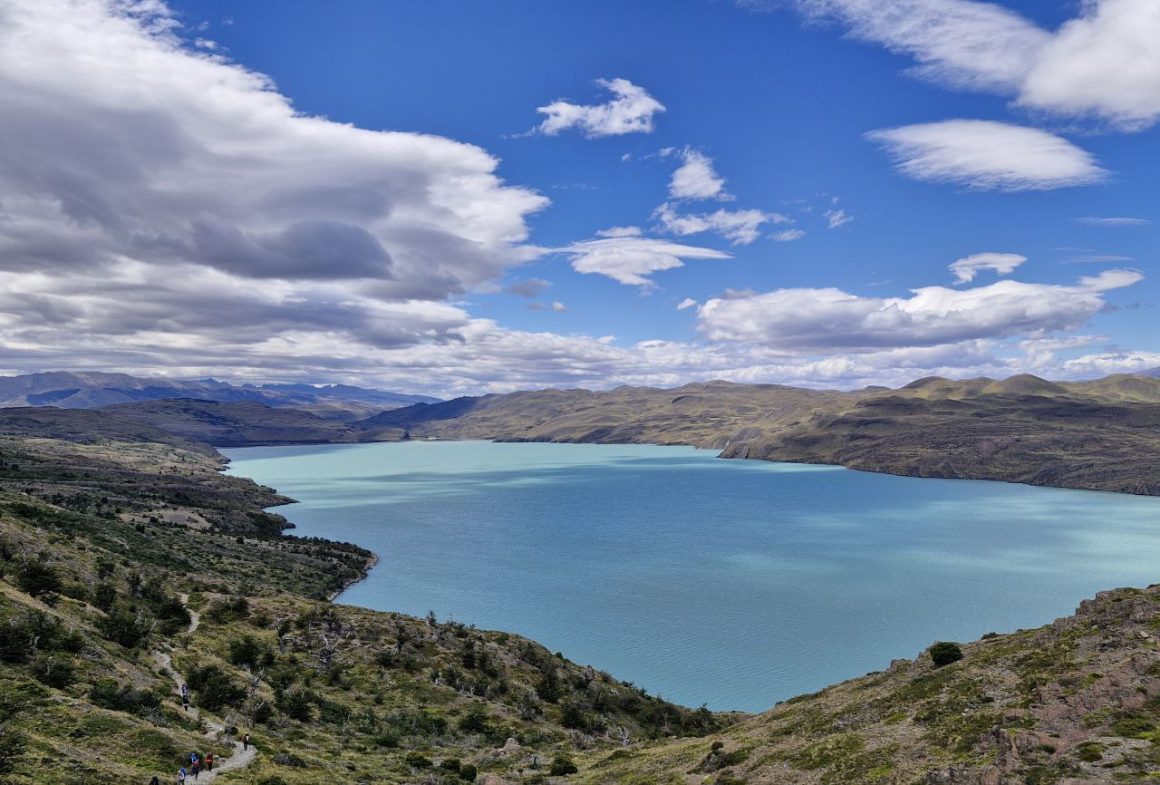
19 km / ~9 hours Frances → Chileno. Probably the most scenic stretch of the whole trek. Up and over mountain ridges, along lakes, through canyons, with views so otherworldly you half expect to spot a space rover. I caught my second wind multiple times that day, purely from the beauty around me.


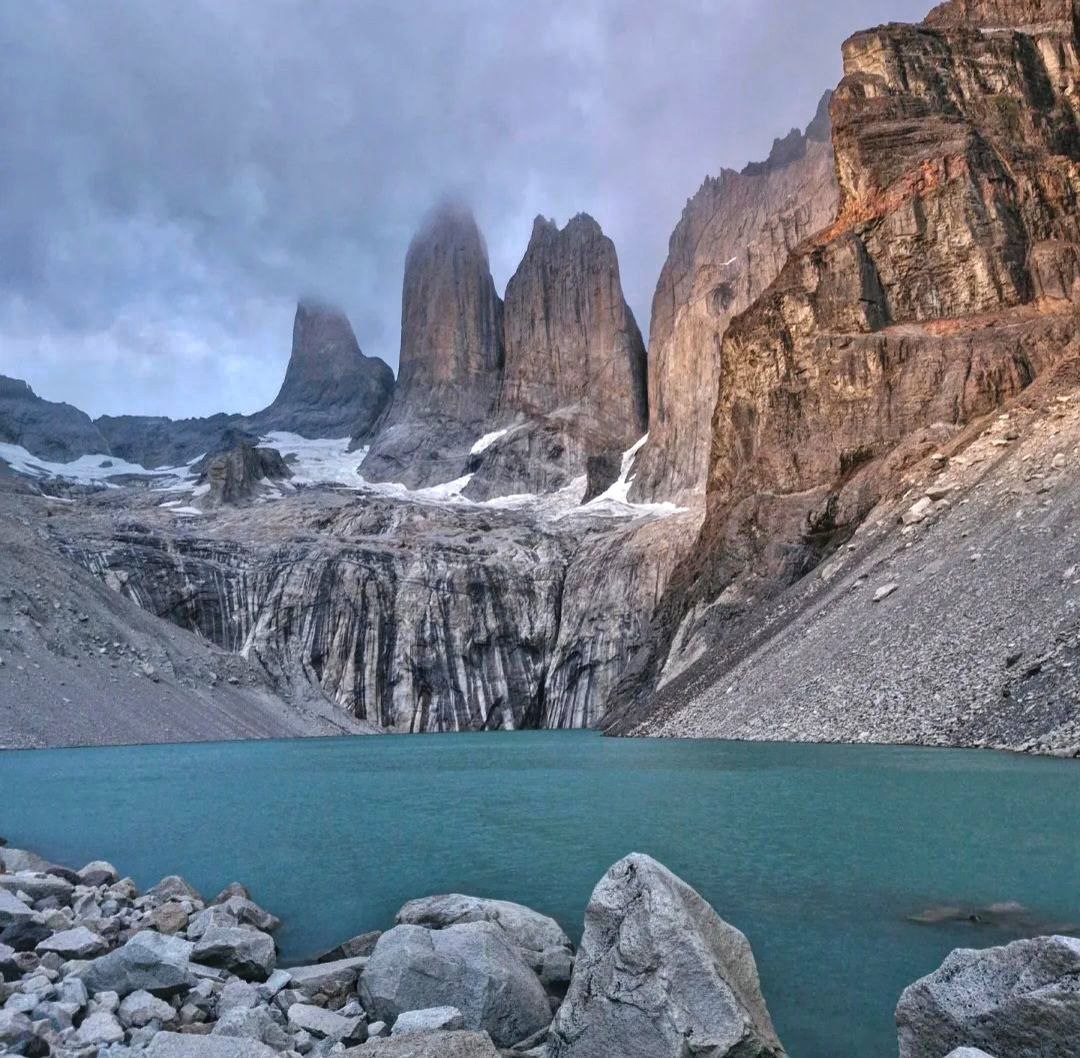
Camp Chileno is the closest jumping-off point for the side trip to the Torres lake, known as Base Torres — the emotional climax of the entire hike. This camp is noticeably busier than the others because it draws not only through-hikers but also day-trippers who take the bus to the trailhead and do the 12-mile out-and-back in a single day (yes, that’s an option too).

Day 5
16 km / ~5 hours Pre-dawn summit push to Base Torres, descent back to camp, breakfast, and the hike out to the shuttle.

For about five minutes, the sun hits the towers in a way that’s nothing short of magic. To catch it, you set your alarm for 3:30 a.m., crawl out of your sleeping bag, click on your headlamp, shoulder your daypack, and head into a two-hour climb of nearly 3,000 feet over loose boulders, in the dark, in the Patagonian wind. At the top, it is seriously cold.

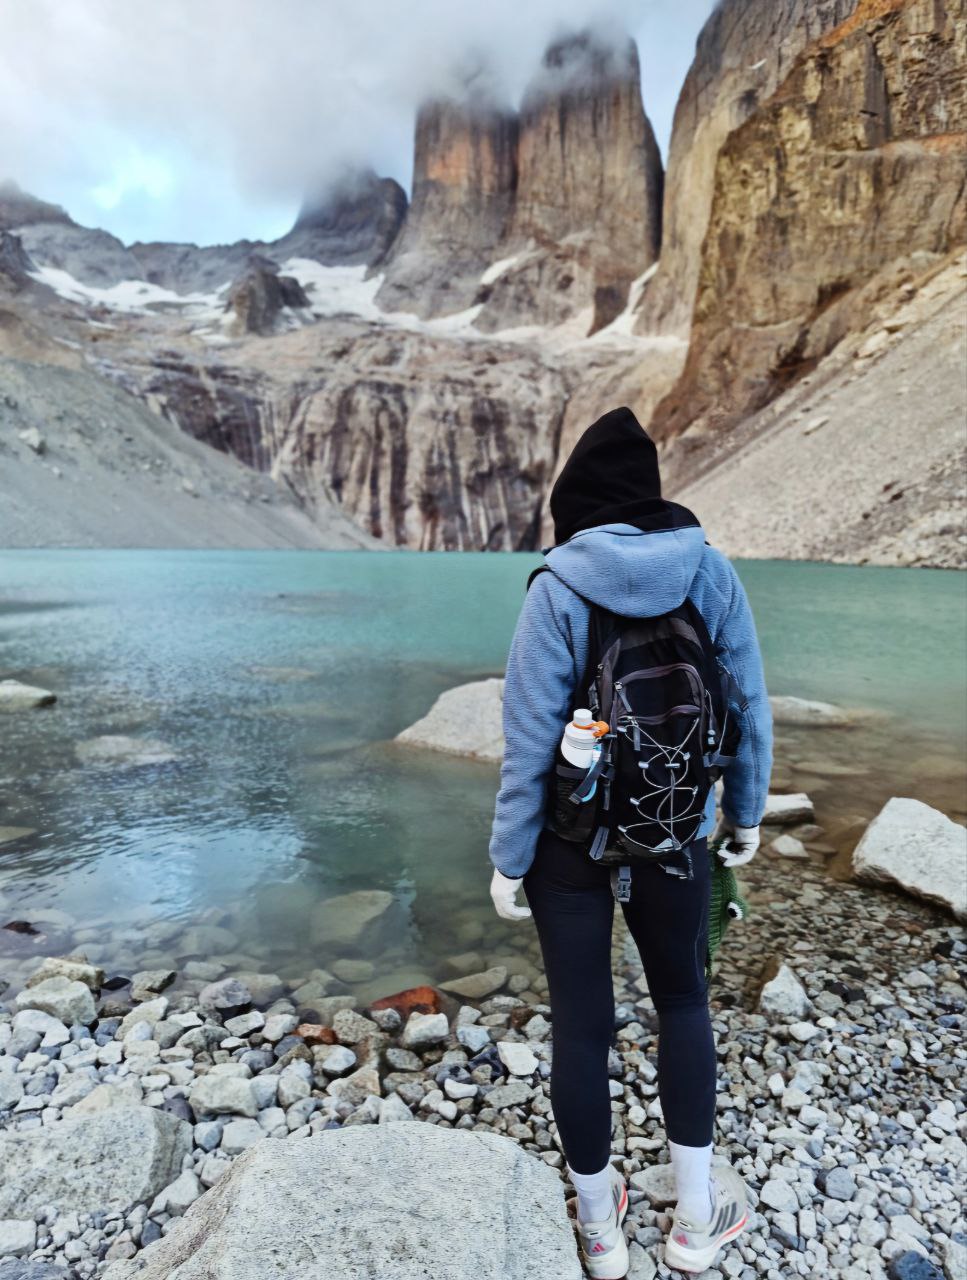

You’ll arrive at the summit soaked in sweat from the effort, and that’s exactly when every warm layer you packed becomes priceless. Hat, gloves, down jacket, fleece, hoodie — when you’re huddled behind a boulder in the pre-dawn darkness, straining to see the first light while the wind tears through you, you’d put on every piece of clothing you own just to feel a degree warmer.


The sun didn’t appear right away. For a moment we thought the clouds had won, and we’d miss it entirely. But the magic happened — rays of light slipped through the overcast sky and lit up the towers.
After that, it’s back down. Aim to be at camp by 9 a.m. — that’s when the showers turn off, and you’re going to want one badly after this. Then breakfast, coffee, and the walk down to the shuttle, which connects to the bus back to the Puerto Natales bus terminal. Buy your return bus ticket in advance online — seats can fill up.
Where to Recover in Puerto Natales
Hacienda Dorotea
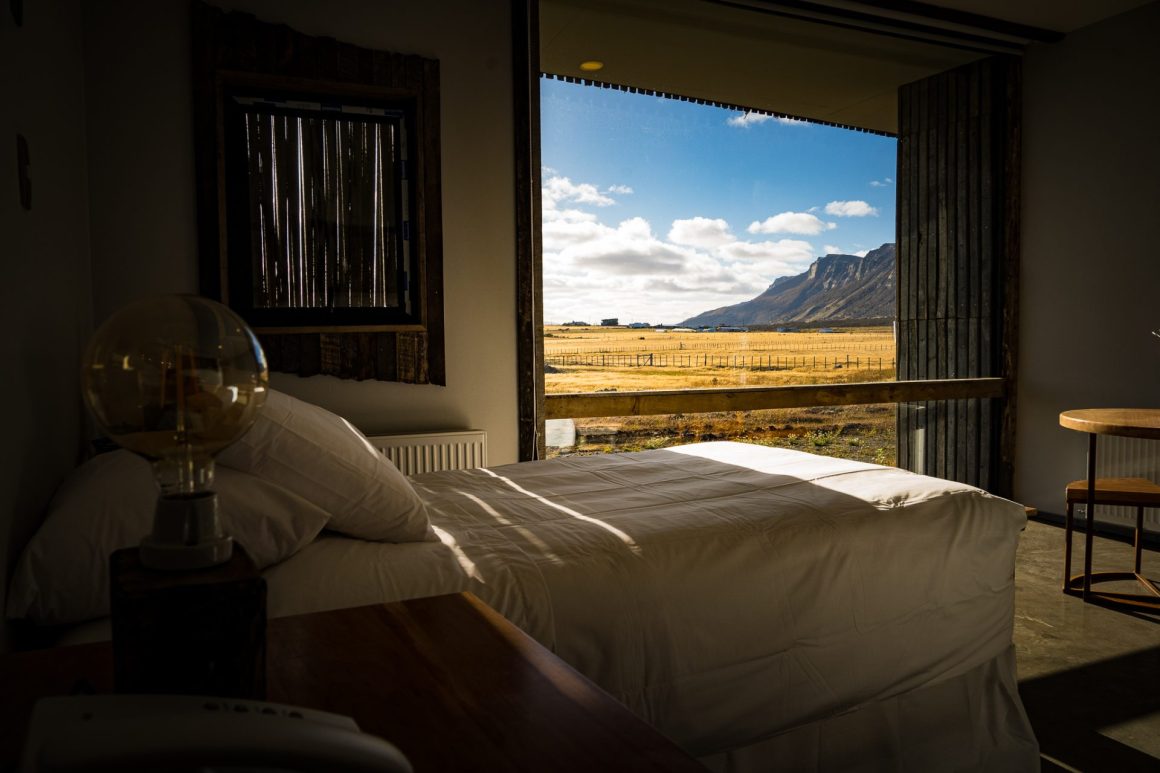
7 minutes by car from the center. Double rooms from $180. On-site restaurant and bar, in-room massages ($70 for an hour), views of mountains, fields, and horses from your window — the vibe of a high-end ranch at the end of the world.

Website: haciendadorotea.cl
La Disqueria Restaurant
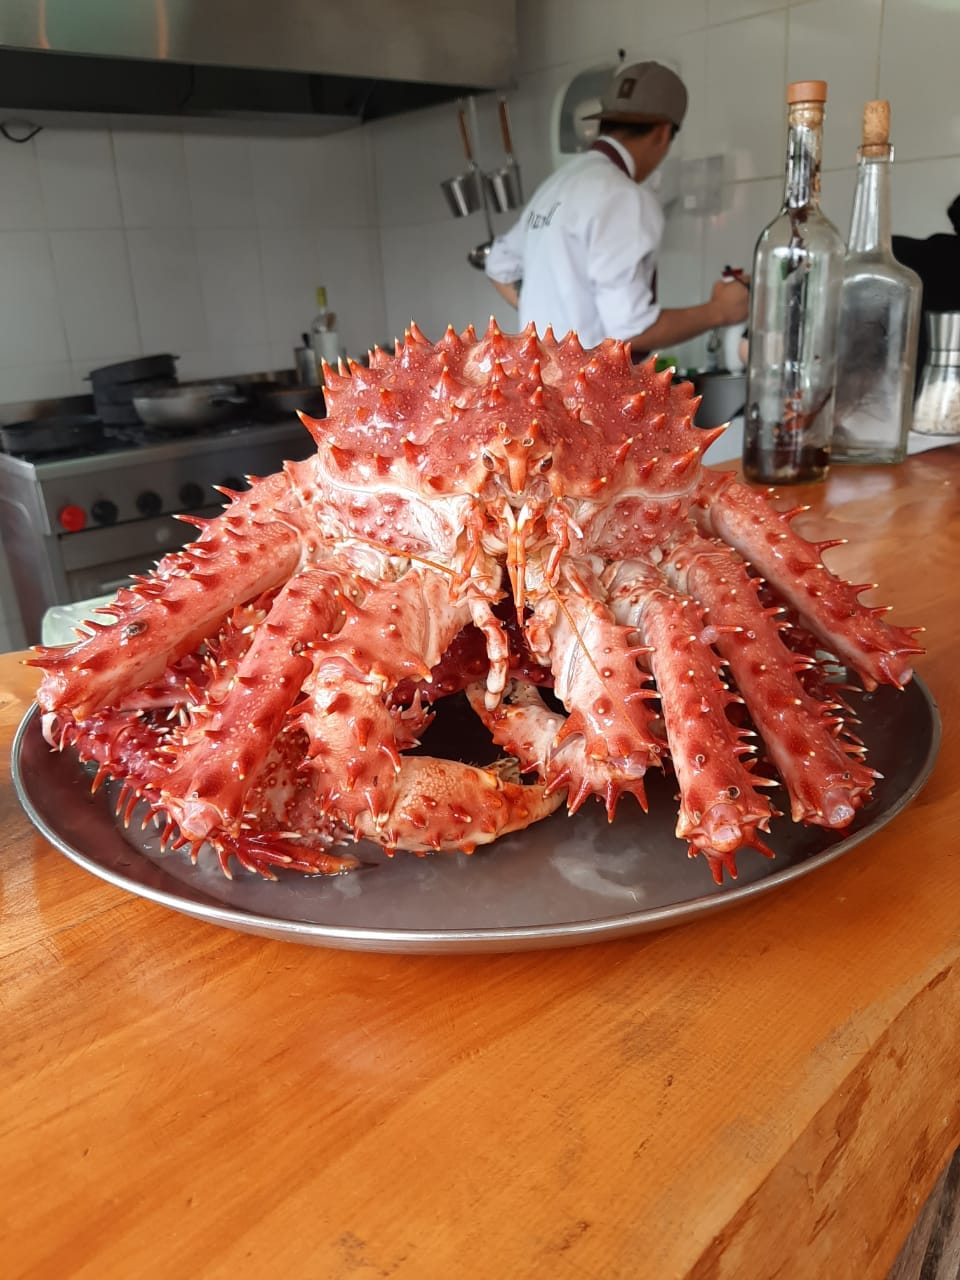
No reservations, and there’s almost always a wait in the evening. Go anyway. It’s worth every minute.